

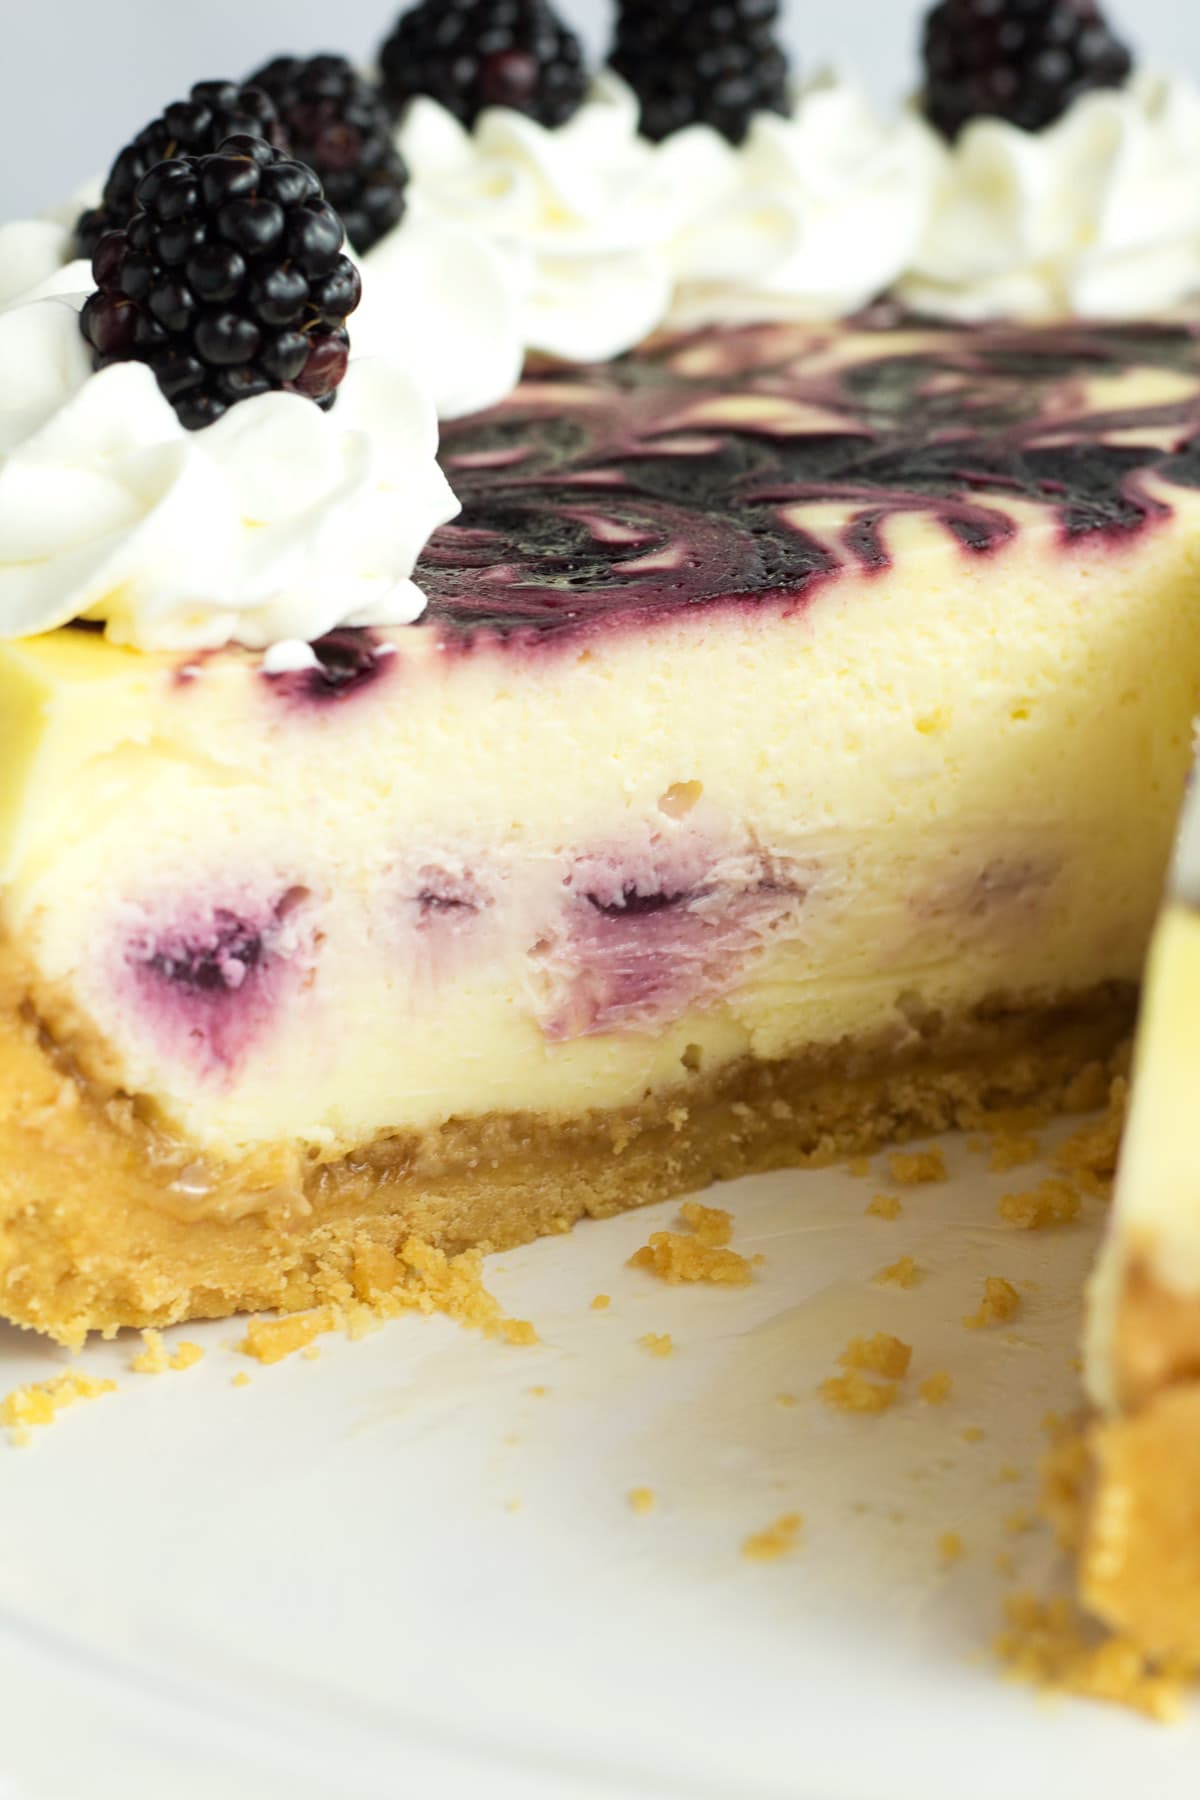
This Blackberry Cheesecake is ultra creamy, swirled with tangy blackberry sauce, and baked on a lemon Oreo crust for an extra burst of flavor. We use a fool-proof and easy water bath method to make a perfectly flat cheesecake with no cracks and no burnt sides… ever! It's truly a 5-star cheesecake that's great for entertaining and making ahead.
We love a good cheesecake and have curated a whole list of delicious Cheesecake Recipes you and yours are sure to love!
If you're in need of a new stunning and delicious cheesecake, you've found it friends! This Blackberry Cheesecake recipe is decadently smooth with a gorgeous blackberry swirl and bright lemon Oreo crust. It's a combination of Handle the Heat's cheesecake and our very own White Chocolate Raspberry Cheesecake (which is another must-try dessert!).
If you love delicious desserts be sure to try all of our homemade cheesecakes like this Golden Oreo Cheesecake, creamy Tiramisu Cheesecake, or Strawberry Cheesecake Bars. Be sure to let us know which is your favorite.
Fair warning - this is an image heavy post. But I want you to be super successful, so I've included pictures of each step along the way. I've also included lots of tips and tricks throughout so that your cheesecake will turn out perfectly every time! For a condensed list of the most important tips, check out the Tips & Tricks section right above the recipe.
Skip to:
Why this recipe is great
- First things first, it tastes AMAZING. Blackberry cheesecake is perfect for spring and summer. It's creamy as can be, not overly sweet, and did I mention the lemon crust? It's truly the perfect complement to the tangy blackberries.
- NO CRACKS! I know water baths can be annoying… but I use an easy and fail-proof method to ensure that you get zero cracks and NO soggy crust.
- Cheesecake is fantastic for making ahead and even freezing. So you can have Mother's Day or Easter dessert ready to go. Find it amongst a variety of delicious options on our Easter recipes and Thanksgiving recipes lists!
I've made this cheesecake several times. It is the best cheesecake recipe I've ever used.
⭐⭐⭐⭐⭐ - Karen
Ingredients for blackberry cheesecake
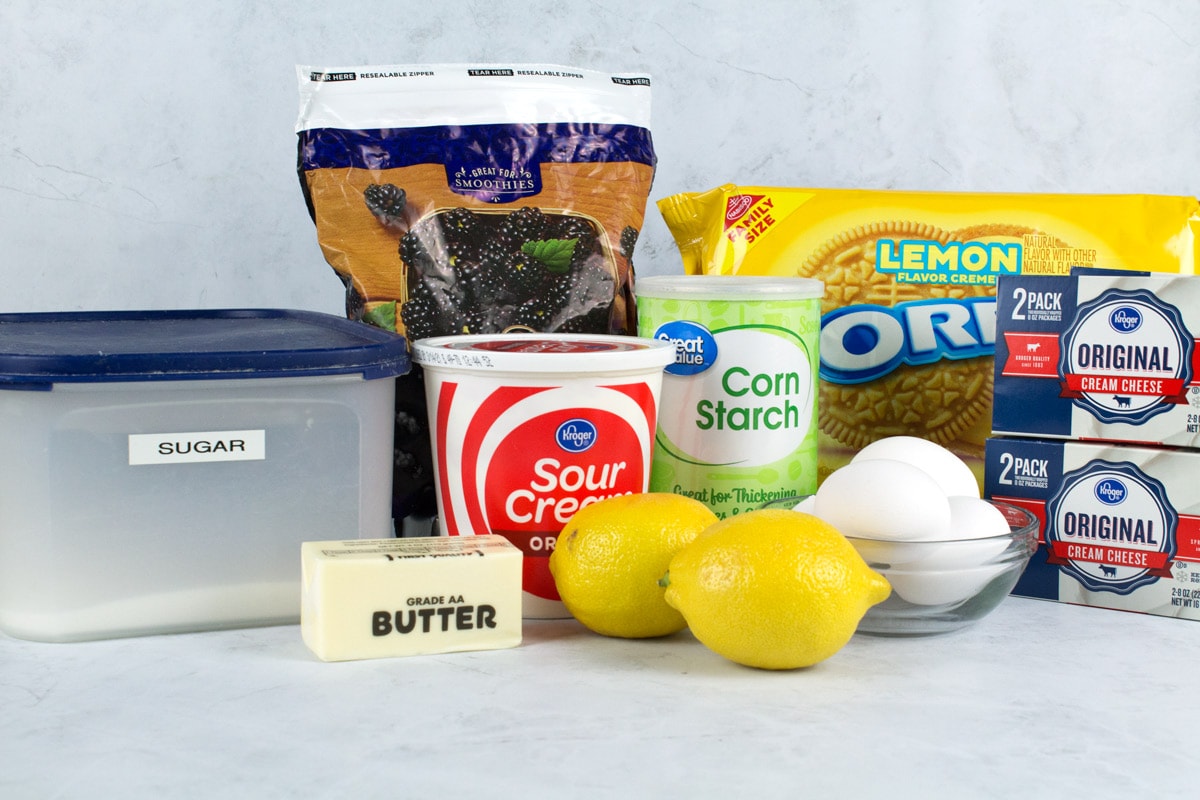
A full list of the ingredients is in the recipe card below, but here are a few noteworthy tips:
- Blackberries: We use frozen blackberries because the store has them all year round, plus they tend to taste better if it's not blackberry season. But it's also great when you have an abundance of fresh blackberries.
- Lemon Oreos: You can use graham crackers to make a graham cracker crust instead, but the lemon blackberry combo is delicious!
- Cream cheese: It is essential that the blocks of cream cheese be at room temperature before using. It should dent very easily when pressed with a spoon.
- Eggs: These should also be room temp. Leave them on the counter or set them in a bowl and cover with warm water for about 10 minutes.
- Sour cream: Again, this must be fully at room temperature before using, so take it out of the fridge early. It adds the perfect amount of tang, plus it makes for a light and creamy cheesecake.
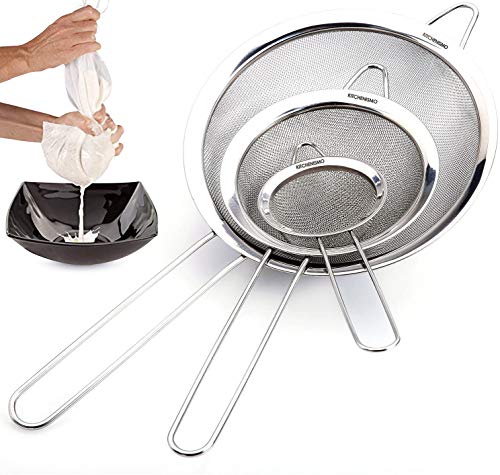
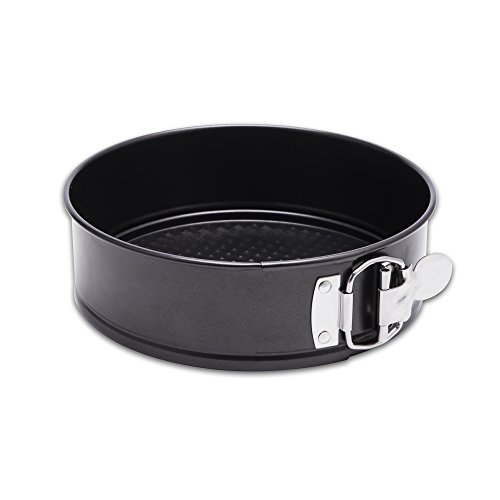
Helpful kitchen tools


How to make blackberry cheesecake
Water bath
The secret to making water baths both easy and effective is to use slow cooker liners (affiliate). They keep the water out but withstand the heat perfectly!
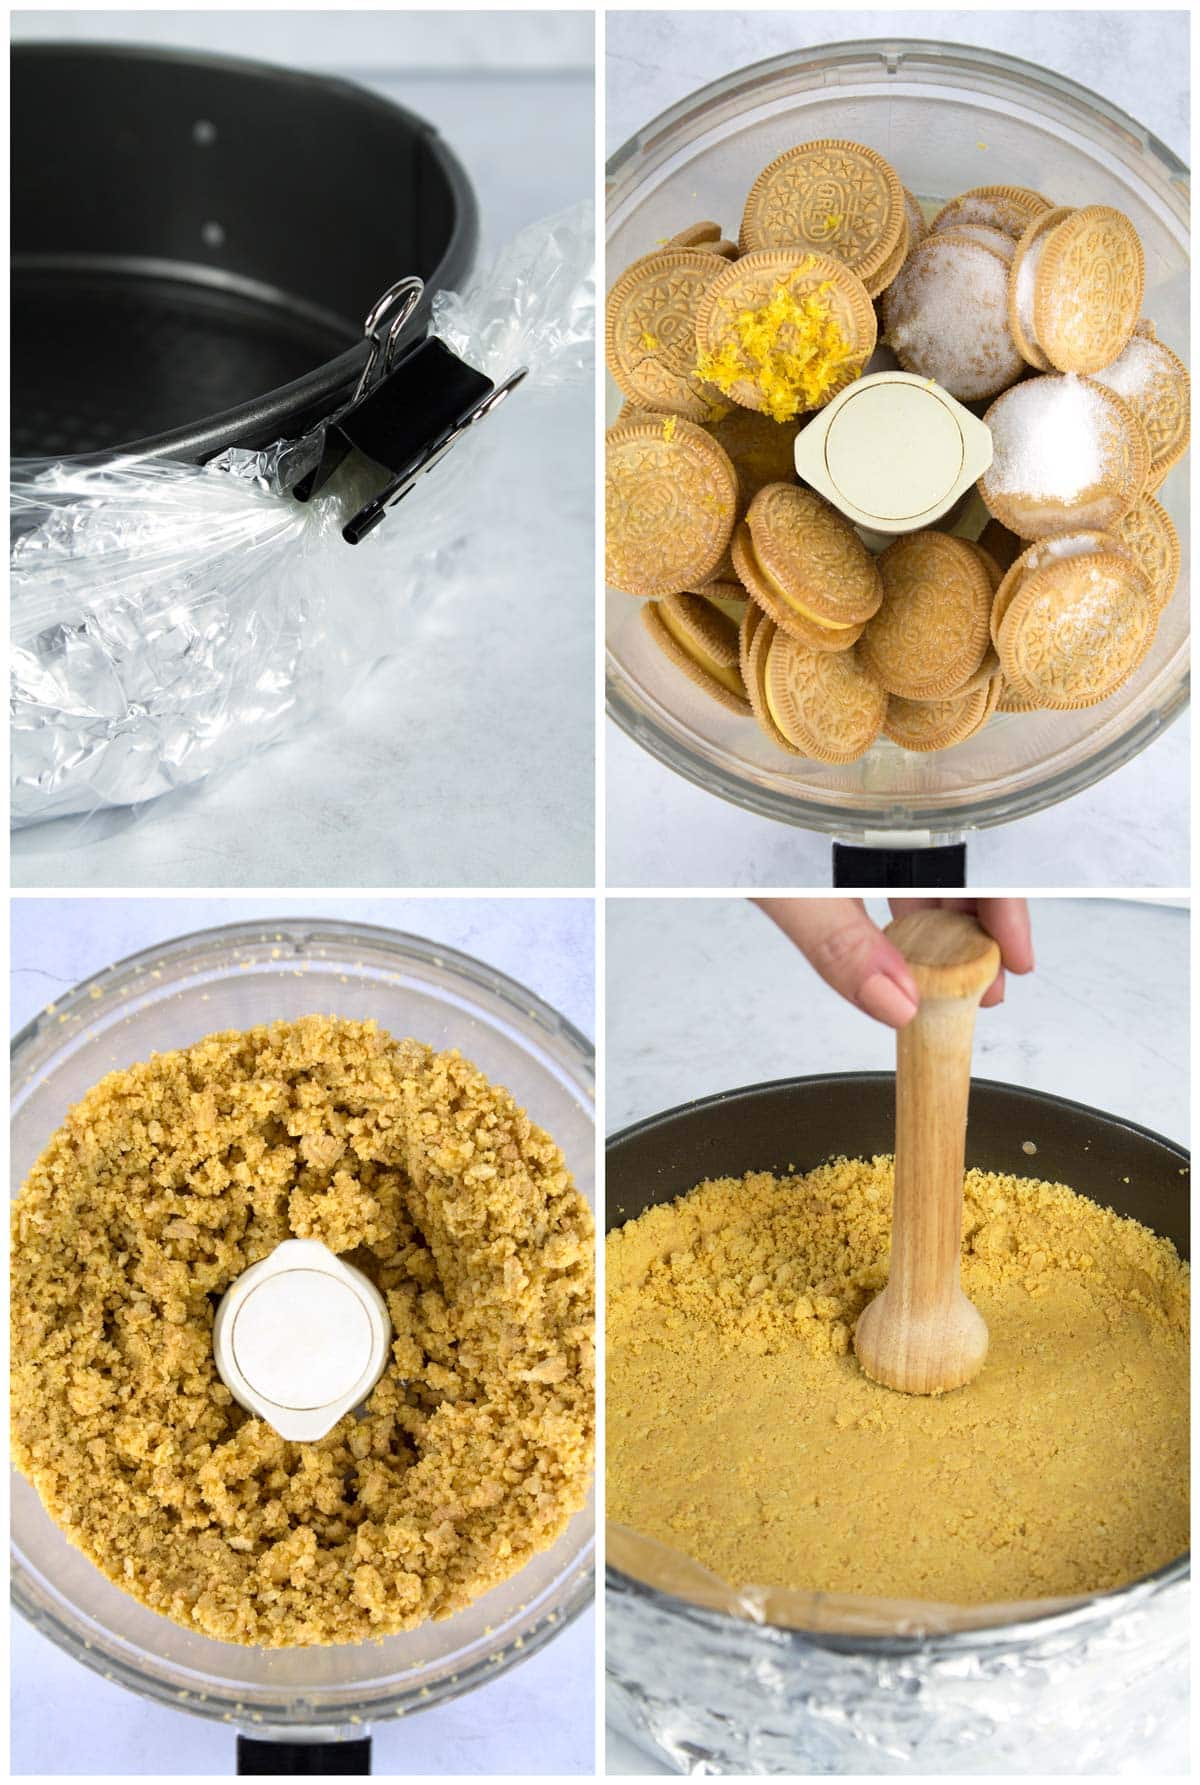
- Prep the pan: Take one large piece of parchment paper and lay it over the circular bottom of the springform pan. Then set the outside rim on top, press it firmly down over the circular bottom, and clamp it shut. You can easily fold the extra parchment underneath the pan or trim it off. Then spray lightly with baking spray.
- Wrap in foil: Lay two pieces of foil on the counter to form a + sign. Set the pan in the center and wrap the foil tightly up the sides of the pan.
- Wrap in slow cooker liner: Next, set the pan inside a slow cooker liner (affiliate - I've had great success with this brand). Pull all the excess liner to one side, making sure the liner goes all the way to the top of the pan (or even slightly over the edges). Twist the liner tightly, then secure with a binder clip (yes, these are oven safe. This is a tip we learned from Martha Stewart).
Cheesecake crust
This lemon crust is delicious but if you prefer a standard graham cracker crumb crust feel free to substitute. No need to bake the crust before assembling the full cheesecake mixture.
- Combine: Add the lemon Oreos, sugar, melted unsalted butter, and zest to the bowl of a food processor (affiliate). Pulse it until the cookies are in fine crumbs (it should look like wet sand).
- Press into pan: Using your hands, the bottom of a measuring cup, or a tamper, press the crust into the sides of the springform pan (affiliate). I press the sides up first, about 1-1.5 inches tall. Then I press the bottom in firmly.
Blackberry Sauce
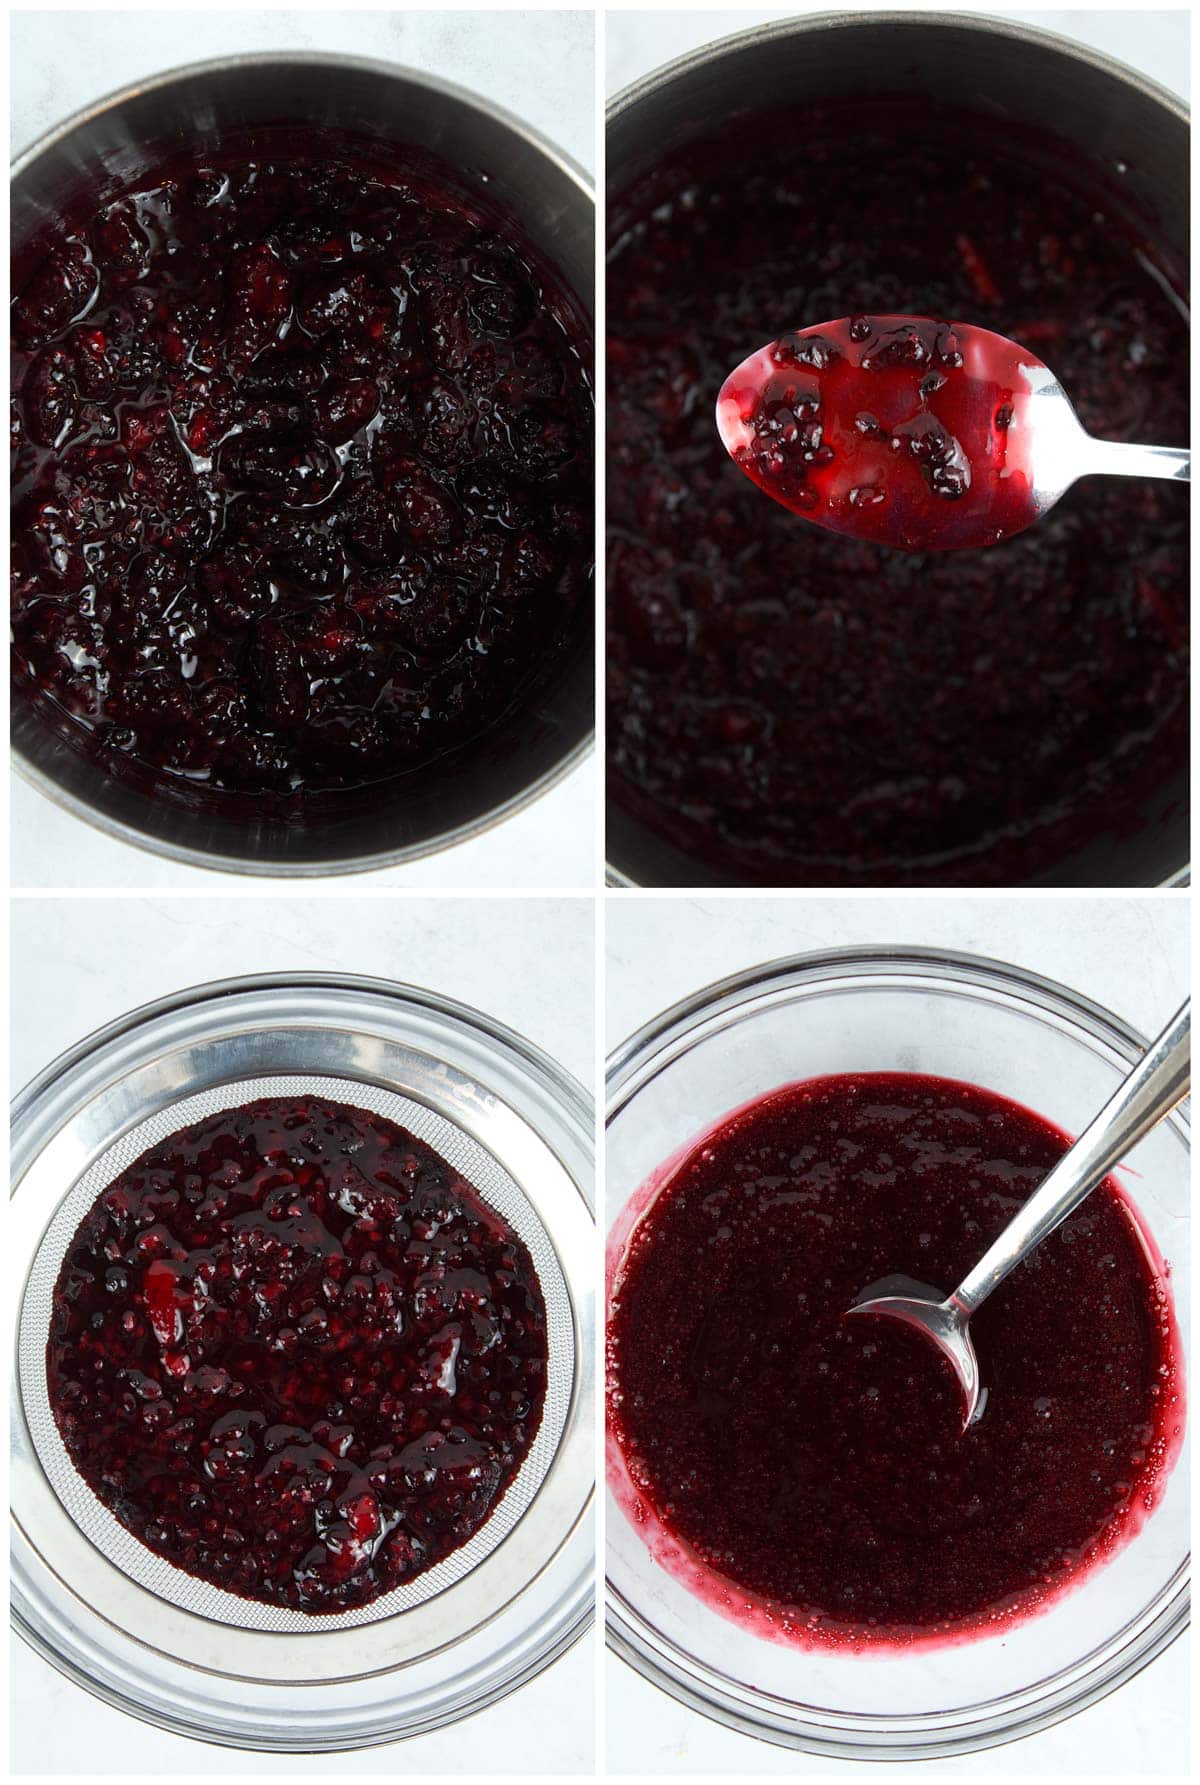
- Cook: Pour the frozen blackberries (or fresh berries) in a small saucepan and cook in the saucepan over medium heat until it is pretty thick (5-6 minutes). Use the back of a spoon to crush the blackberries until the sauce is evenly chunky.
- Strain: Pour the blackberry puree through a fine sieve (mesh strainer) to remove any lumps and seeds into a small bowl. The resulting sauce should be smooth and glossy. Set aside.
Cheesecake batter
- Boil water: Start a large pot of water on the stove to boil for the water bath.
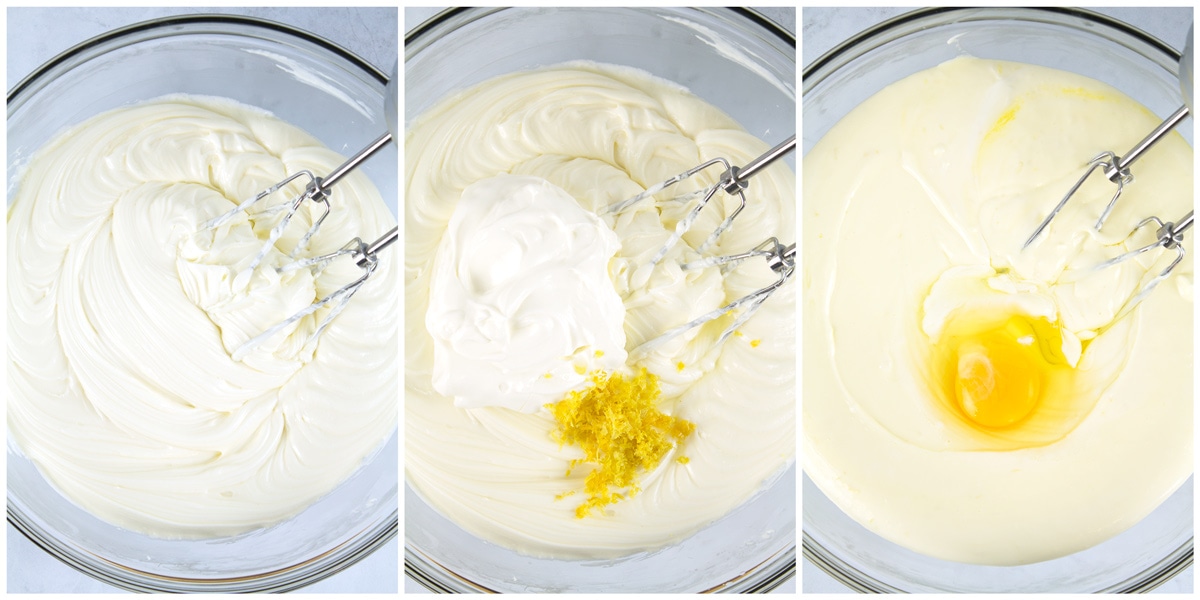
- Beat cream cheese: In the bowl of a stand mixer or with hand mixer (affiliate), beat the cream cheese in large bowl on medium-low speed until very smooth. Scrape well with a rubber spatula.
- Add sugar: Add the sugar, then beat again on medium speed until very smooth. Scrape well.
- Add sour cream: Next add the sour cream and lemon zest, mixing on low until just combined.
- Add eggs: One at a time, add the eggs and combine on LOW speed until just combined. Scrape the cream cheese mixture well between each addition and do not overmix.
Assemble the cheesecake
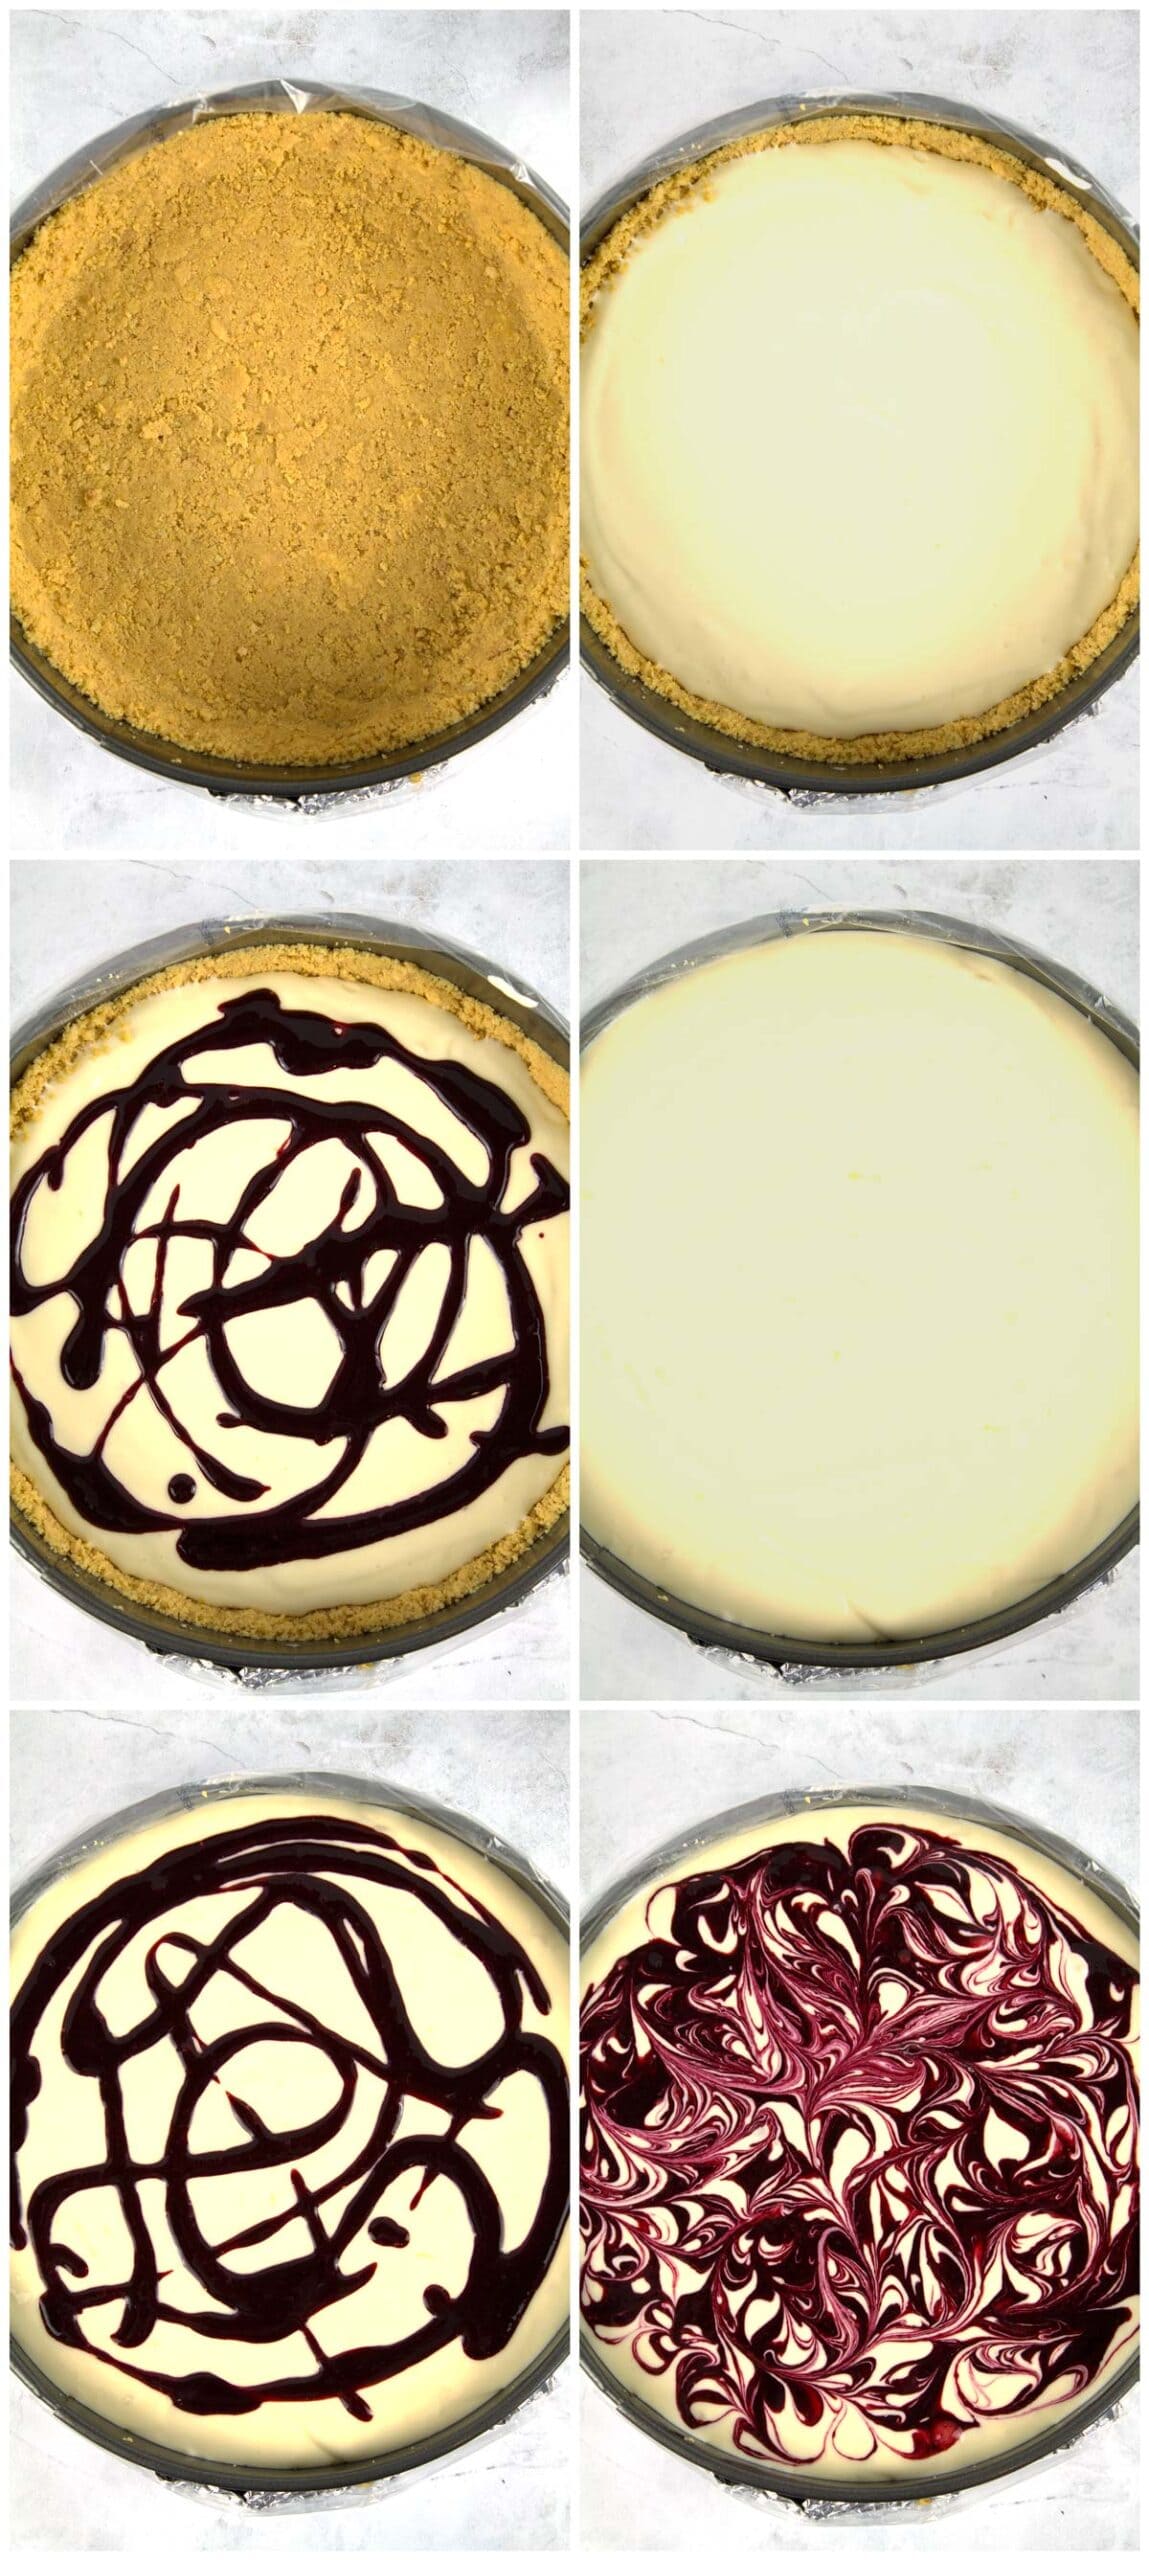
- Batter: Pour half of the creamy cheesecake filling into the prepared crust.
- Blackberry sauce: Drizzle 3 tablespoons of blackberry sauce over the top of the batter.
- Batter: Add the remaining half of the batter gently to avoid pushing all the sauce to the edges.
- Sauce: Drizzle another 3 tablespoons of the blackberry mixture on top, being sure to go all the way to the edge of the pan.
- Swirl: Using a skewer or toothpick, swirl the blackberry sauce using small circular motions until it looks like desired. Only swirl the top ½ inch of batter.
Bake cheesecake
- Add hot water: Once the oven temperature is 325 degrees, place the cheesecake into a large baking tray. Place the tray into the hot oven, then pour the boiling water into the large tray until it reaches about half way up the side of the springform pan.
- Bake: Close the oven door and bake the blackberry cheesecake for 70-90 minutes, or until the top is dry, edges are set, and the center is somewhat jiggly like jello.
- Open the door: Turn off the oven, crack the door about an inch, and allow to cool for 1 hour.
- Continue cooling: Remove the pan from the oven and take the cheesecake out of the water bath, liner, and foil. Dab up any moisture or yellow oils from the Oreos, then set the cheesecake on a cooling rack and allow to come to room temperature for 2-4 hours.
- Refrigerate: Leave the cheesecake in the pan and refrigerate until cold, 4-5 hours. Once cold, remove the whole cheesecake from the springform pan and serve with remaining blackberry sauce.
- Store cheesecake: If the blackberry cheesecake will be eaten with in two days, store it covered in the refrigerator. If you want to freeze it see the instructions below.
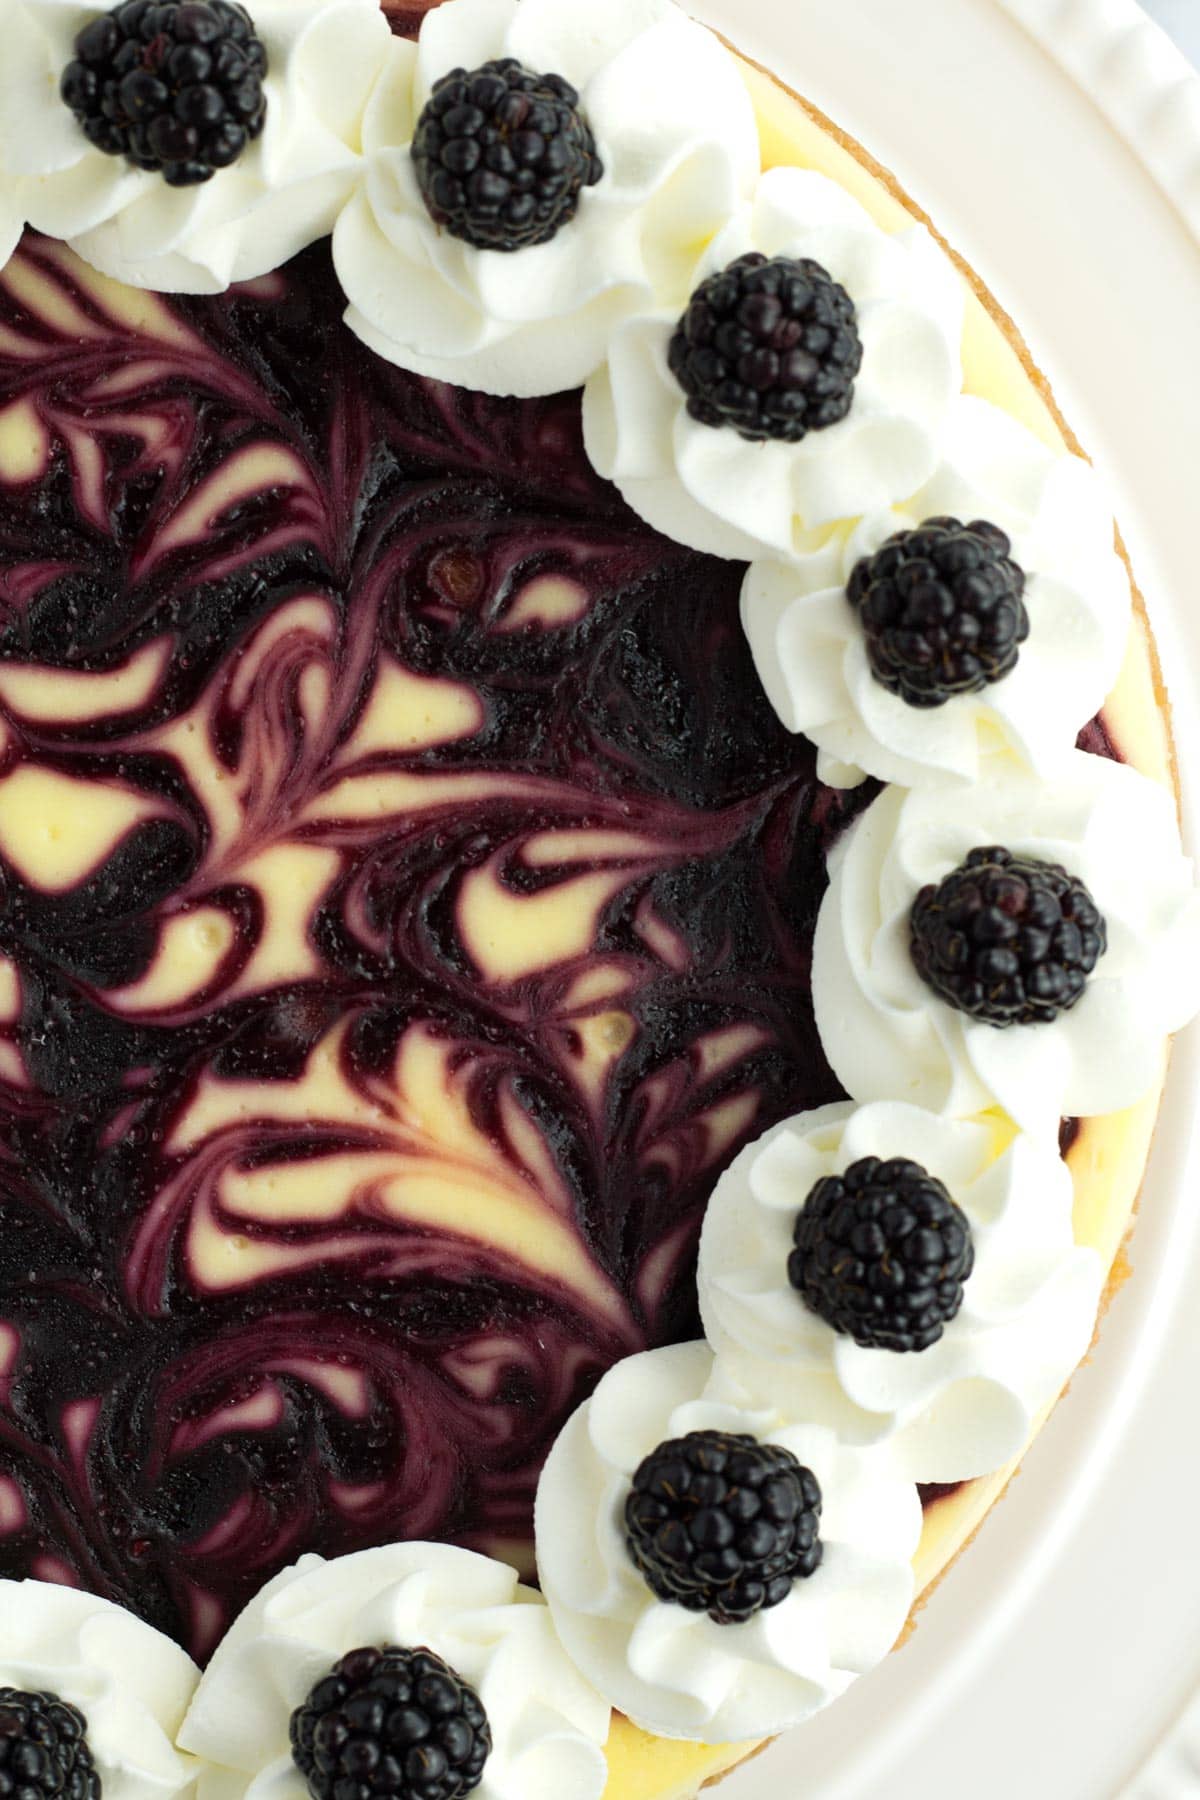
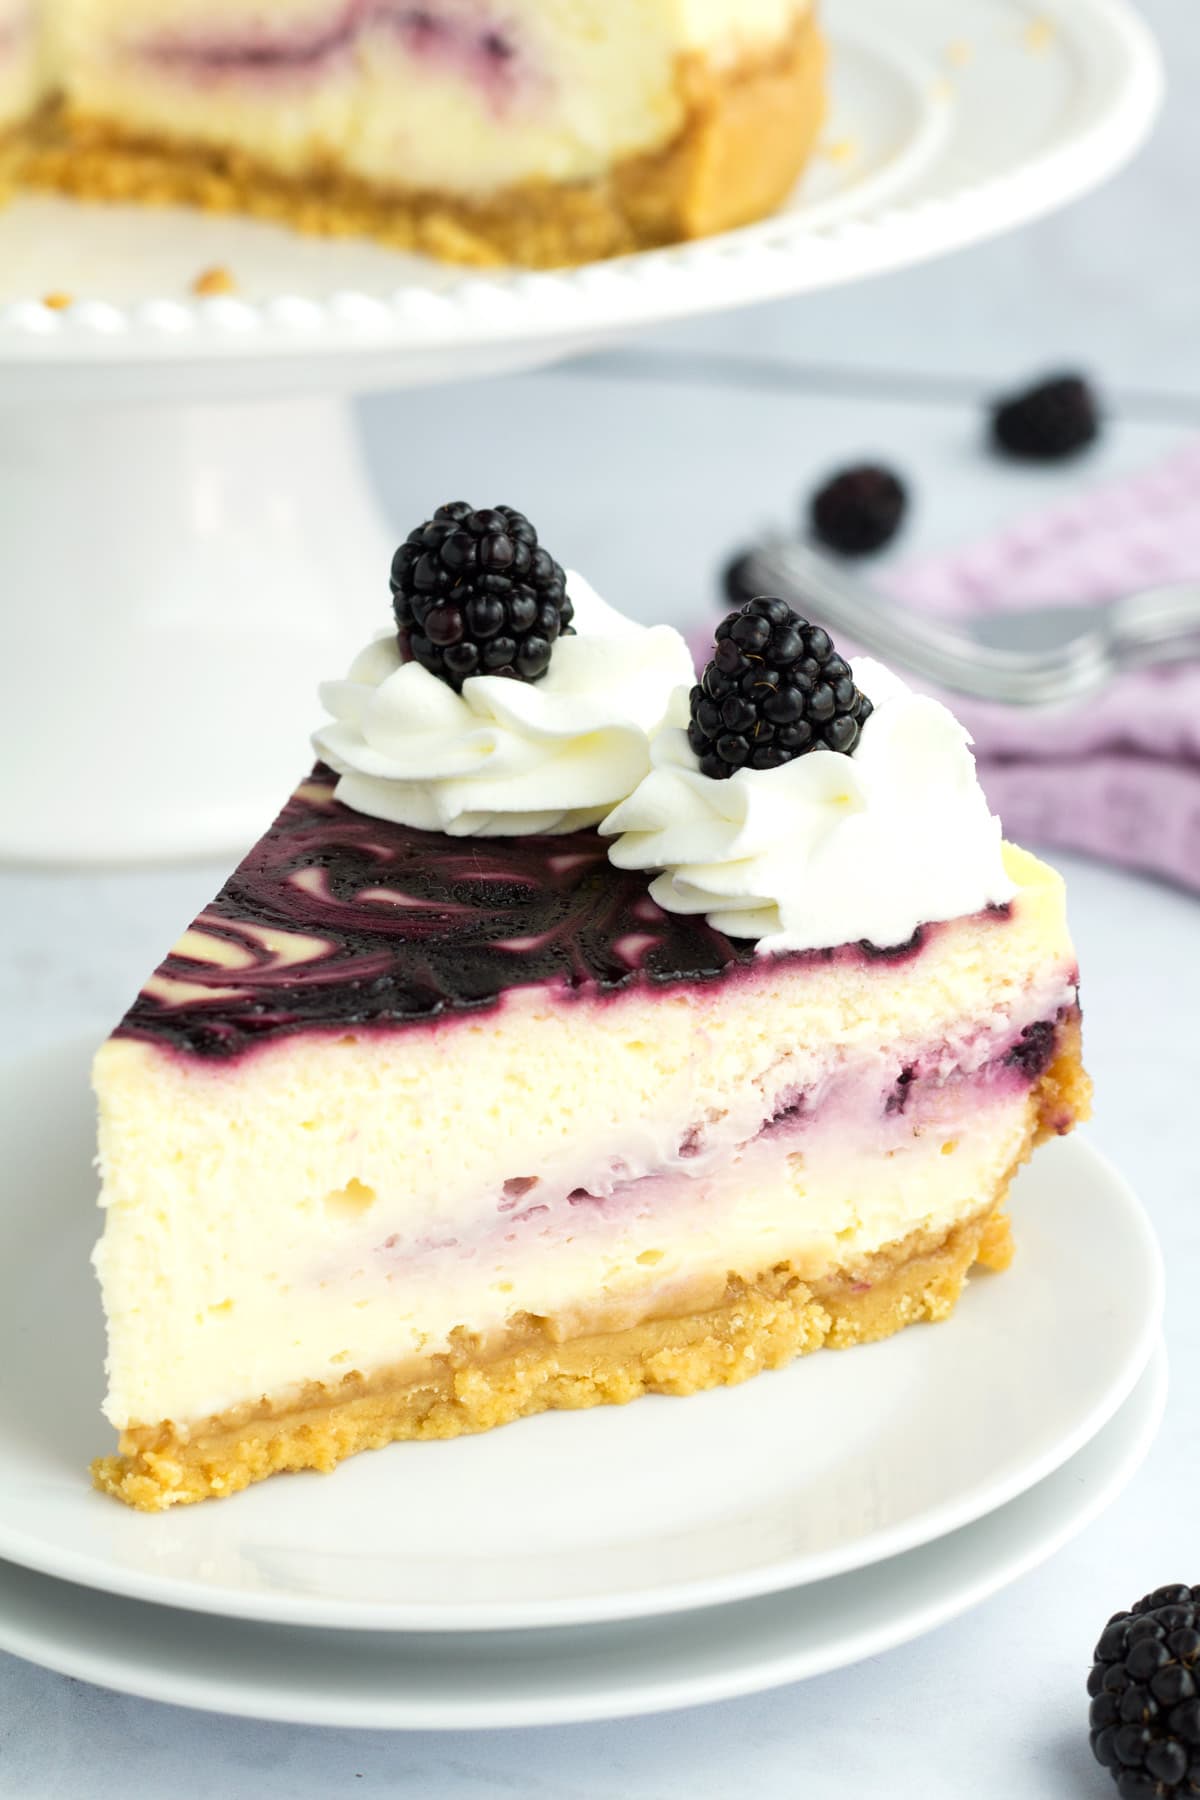
Decorating blackberry cheesecake with whipped cream
Start by whipping heavy cream, sugar, and vanilla extract to stiff peaks with a wire whip attachment. Transfer whipped cream to a decorating bag with a large star tip and make swirls evenly around the perimeter of the blackberry cheesecake. Place a fresh berry on the top of each swirl.
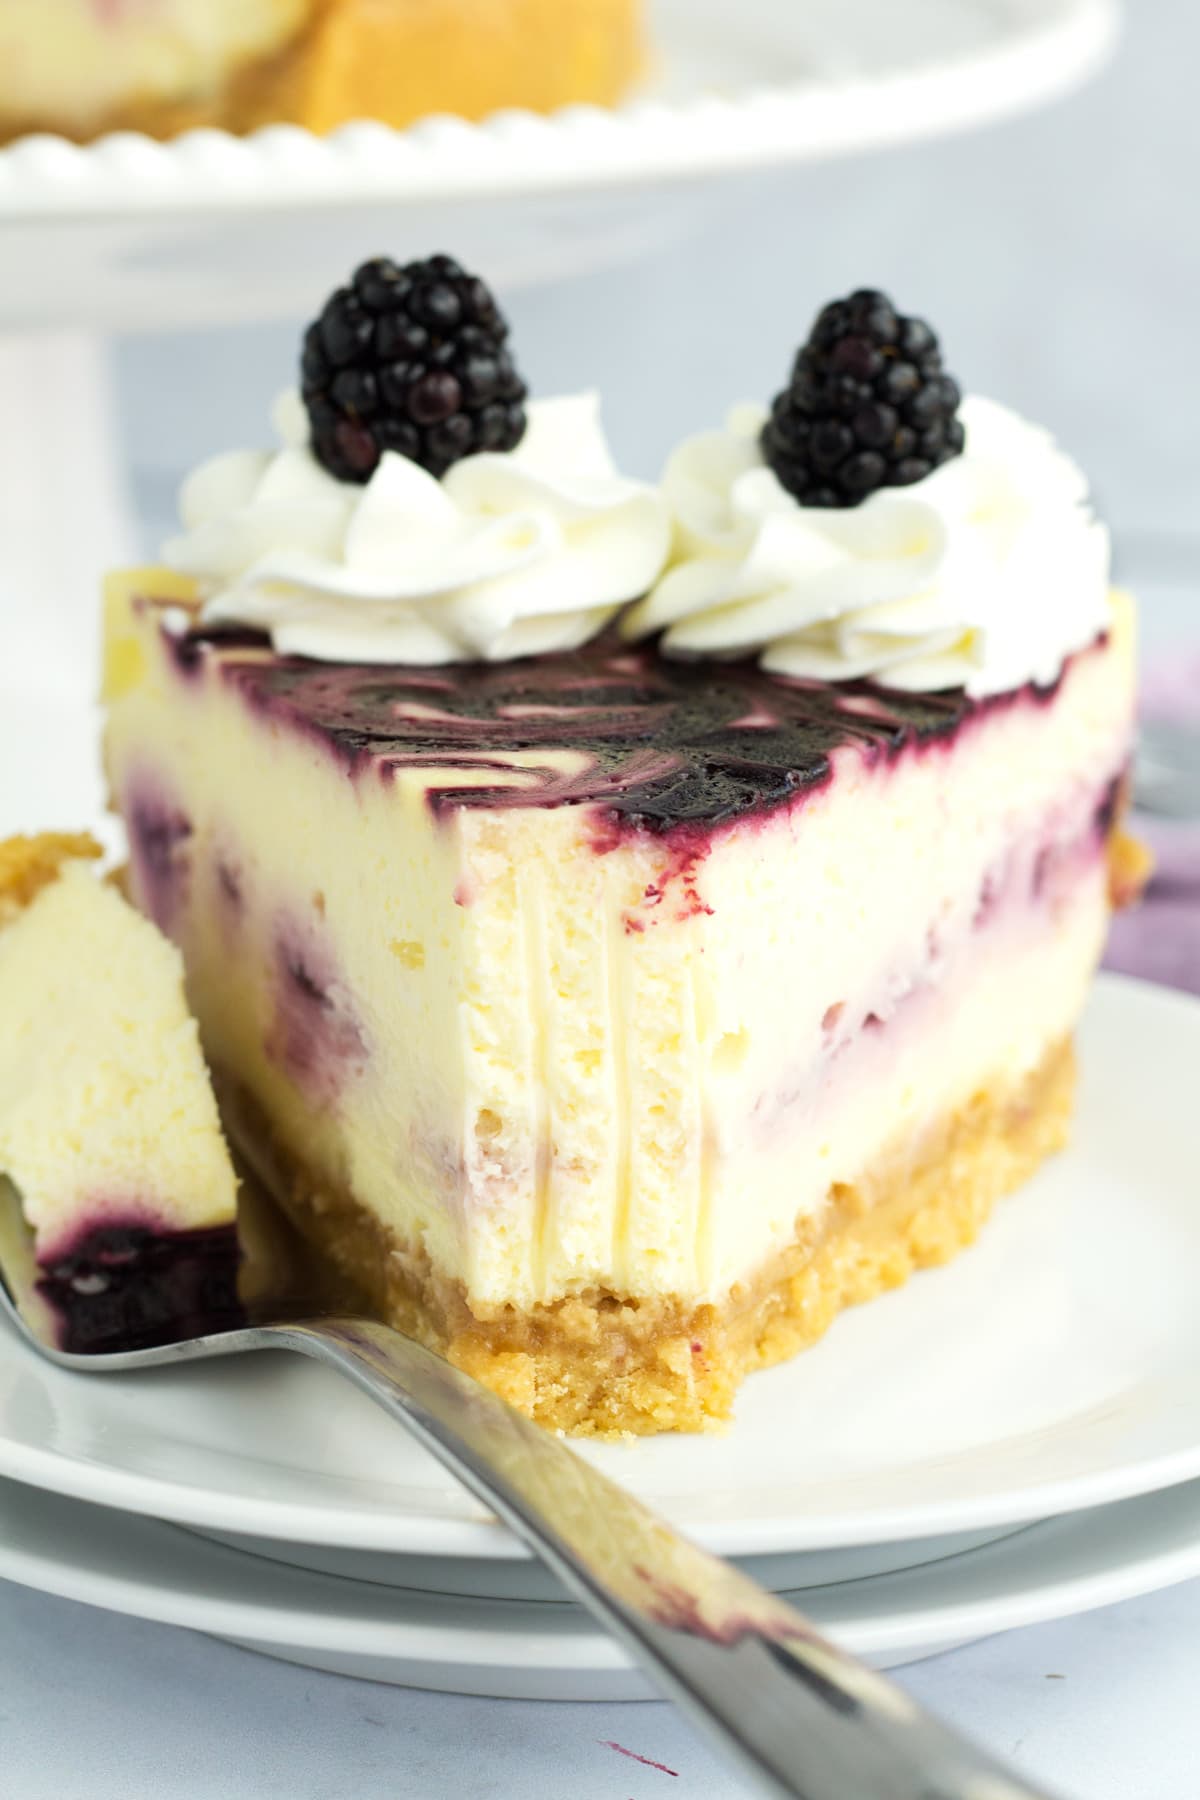
For a crowd
Cheesecake is a great crowd pleaser. Blackberry Cheesecake in particular is a rich dessert, so small slices go a long way. When you are cutting thin slices, I recommend using this serrated Swiss paring knife (affiliate) and wiping the blade off with a paper towel after each cut. This helps prevent large chunks from breaking off the thin pieces so that you get neat slices each time. Plus it keeps the blackberry swirls pretty.
FAQs
Cheesecakes crack for three main reasons:
1. Too much air in the batter: Mix the cheesecake batter on medium-low speed at first, and only on low speed after you add the eggs. Eggs incorporate air easier, so mix the batter until the eggs are just combined, then stop.
2. Over cooked: See my section below about how to know when your cheesecake is done.
3. Cooled too fast: To prevent this, use the progressive cooling timeline listed in the recipe card, which involves leaving the oven cracked, cooling at room temperature, then refrigerating.
If your cheesecake does have cracks, don't fret too much! You can leave it as is, or you can always cover the top with blackberry topping, lemon twists, or whip cream. Cracks can always be disguised. 😊
Using a water bath isn't 100% necessary, but it does have a HUGE impact on the final result. I highly recommend it. If you don't want to use a water bath, try out this recipe for White Chocolate Raspberry Cheesecake instead. Just know that the edges may be brown and the top won't be perfectly flat.
Knowing when cheesecake is done can be a bit tricky… every oven is different, so the key is to start checking it at the lower end of the cooking range, and then look for visual cues. The edges will be set and firm, and the top will be dry. The middle of the cheesecake will still be jiggly - not sloshy or liquidy, but not firm either (like jello).
Once you see those visual cues, stop baking it. It is very important not to over bake because it will continue to cook as it cools. If at any point you see small cracks forming, stop baking immediately.
Absolutely! Freezing your cheesecake is a wonderful option if you want to make it ahead for a party, bridal shower, Easter, Mother's Day, or similar event. It is also a great option for leftover cheesecake that you don't want to go to waste.
You can freeze the whole blackberry cheesecake or individual slices. Either way, completely cool and refrigerate your cheesecake as directed before freezing. Then place it on a cookie sheet and freeze unwrapped for 2-3 hours. This ensures that the cheesecake won't be dented or otherwise ruined when you wrap it. Then wrap it in a layer of plastic wrap and a layer of tinfoil. Freeze for 1-2 months.
This cheesecake is easy to store. Once It has been removed from the ring portion of the springform pan, It can be covered with plastic wrap and stored until time to serve. If storing it with whipped cream swirls opt for a airtight container, I prefer this cake carrier (affiliate).
This white chocolate raspberry cheesecake recipe can be made up to two days in advance if storing in the refrigerator or see the freezing instructions above for a longer storage time.
Top tips and tricks
- Start with truly softened cream cheese to avoid lumps in the batter. The best way to soften it is to leave it on the counter until it is room temperature and very easily dents when pressed with a spoon or finger. If it feels slightly firm or cold it's not ready yet.
- Make sure the cream cheese is beaten until very smooth before adding the eggs. If there are lumps before adding the eggs it will be difficult to remove them.
- Don't over mix the batter - this is key! Keep the mixer on medium-low before adding the eggs, and only on low after the eggs have been added. If you mix on a higher speed or for too long, it will add air to the batter and cause cracks during the baking.
- Avoid over baking the cheesecake. Over baked cheesecake is dry, cracked, and very brown. Your cheesecake is done when the edges are set and firm, the top is dry, and the middle is still jiggly like jello.
- To avoid cracks, cool your blackberry cheesecake progressively as described in the recipe card. Fast changes in temperature cause cracks.
More delicious dessert recipes
- For all those cheesecake lovers, this White Chocolate Raspberry Cheesecake, these Philadelphia Cheesecake Snack Bars, or this simple Golden Oreo Cheesecake are fun flavors to try!
- Feeding a crowd? This Mini Fruit Pizza Bar is a fun and tasty treat that rarely has leftovers.
- For a classic dessert that fits every occasion, try the best Chocolate Bundt Cake. Moist, rich, and covered in delicious ganache!
- All summer weekends need this Moist Orange Loaf Cake. Just bursting with fresh orange flavor, it's one of the best loaf cakes you'll ever make.
- This Strawberry Cheesecake is easy with no water bath needed and topped with the best strawberry topping.
- Try our method for making Graham Cracker Crust for Cheesecake or our Oreo Crust for Cheesecake so you can get that perfect even crisp every time!
Recipe
Blackberry Cheesecake
Equipment
- 9" springform pan
- Slow cooker liners
Ingredients
Blackberry Sauce
- 10 oz frozen blackberries
- ¼ cup water
- 2 teaspoon cornstarch
- 2 tablespoon sugar
Lemon Crust
- 35 lemon Oreos
- 1 tablespoon sugar
- 1 tablespoon lemon zest (about 2 lemons)
- 5 tablespoon butter melted
Cheesecake
- 4 (8 oz) packages cream cheese softened
- 1¼ cups sugar
- ⅔ cups sour cream room temperature
- 1 lemon zested
- 1 teaspoon lemon juice
- 4 eggs room temperature
Instructions
Prepare Pan for Water Bath
- Preheat the oven to 325°.
- Take one large piece of parchment and lay it over the circular bottom of a 9" springform pan. Then set the outside rim on top, press it firmly down over the circular bottom, and clamp it shut. You can easily fold the extra parchment underneath the pan or trim it off. Spray lightly with baking spray.
- Lay two pieces of foil on the counter to form a + sign. Set the pan in the center and wrap the foil tightly up the sides of the pan.
- Set the pan inside a slow cooker liner. Pull all the excess liner to one side, making sure the liner goes all the way to the top of the pan (or even slightly over the edges). Twist the liner tightly, then secure with a binder clip (yes, these are oven safe).
Blackberry Sauce
- Combine the ingredients in a saucepan and cook over medium-high heat until it is pretty thick (5-6 minutes). Use the back of a spoon to crush the blackberries until the sauce is evenly chunky.10 oz frozen blackberries, ¼ cup water, 2 tsp cornstarch, 2 tbsp sugar
- Pour sauce through a mesh strainer to remove any lumps and seeds. The resulting sauce should be smooth and glossy. Set aside to cool.
Lemon Crust
- Add the lemon Oreos, sugar, melted butter, and zest to a food processor. Pulse it until the cookies are mostly fine crumbs (There may be some slightly chunky pieces still. It should look like wet sand).35 lemon Oreos, 1 tbsp sugar, 1 tbsp lemon zest, 5 tbsp butter
- Using your hands or a tamper, press the crust into the prepared pan. Press the sides up first, about 1-1.5 inches tall. Then press the bottom in firmly.
Cheesecake
- Start a large pot of water on the stove to boil. The total amount depends on the pan you use for the water bath. I boil a large pot to ensure I have enough.
- In a stand mixer fitted with a paddle attachment or with hand beaters, beat the cream cheese on medium-low speed until very smooth. Scrape well with a rubber spatula.4 (8 oz) packages cream cheese
- Add the sugar, then beat again on medium-low until very smooth. Scrape well.1¼ cups sugar
- Add the sour cream and lemon zest, mixing on low until just combined.⅔ cups sour cream, 1 lemon, 1 tsp lemon juice
- One at a time, add the eggs and combine on LOW speed until just combined. Scrape well between each addition and do not overmix.4 eggs
Assembly
- Pour half of the cheesecake batter onto the prepared crust. Using a spoon, drizzle 3 tablespoons of blackberry sauce onto the batter. Add remaining cheesecake batter and drizzle another 3 tablespoons of sauce on top, being sure to bring the sauce to the edges. Using a wooden skewer or toothpick, swirl the top ½ inch of the batter with small circular motions until desired swirl is reached.
Bake
- Place the cheesecake into a large baking tray. Place the tray into the hot oven, then pour the boiling water into the large tray until it reaches about half way up the side of the springform pan.
- Bake for 70-90 minutes, or until the top is dry, edges are set, and the center is somewhat jiggly like jello. If you want to test with a thermometer, the center should register 150°.
- Turn off the oven and crack the door about an inch, leaving a wooden spoon or oven mitt to hold it open if needed. Allow to cool for 1 hour.
- Remove the pan from the oven and take the cheesecake out of the water bath. Gently remove the slow cooker liner and foil. Dab up any moisture or yellow oils from the Oreos (some moisture and oil is normal inside the liner). Set the cheesecake on a cooling rack and allow to come to room temperature for 2-4 hours.
- Leave the cheesecake in the pan and refrigerate until cold, 4-5 hours. Once cold, remove from the springform pan and serve with remaining blackberry sauce.
Notes
- Start with truly softened cream cheese to avoid lumps in the batter. The best way to soften it is to leave it on the counter until it is room temperature and very easily dents when pressed with a spoon or finger. If it feels slightly firm or cold it's not ready yet.
- Make sure the cream cheese is beaten until very smooth before adding the eggs. If there are lumps before adding the eggs it will be difficult to remove them.
- Don't over mix the batter - this is key! Keep the mixer on medium-low before adding the eggs, and only on low after the eggs have been added. If you mix on a higher speed or for too long, it will add air to the batter and cause cracks during the baking.
- Avoid over baking the cheesecake. Over baked cheesecake is dry, cracked, and very brown. Your cheesecake is done when the edges are set and firm, the top is dry, and the middle is still jiggly like jello.
- To avoid cracks, cool your cheesecake progressively as described in the recipe card. Fast changes in temperature cause cracks.
Add Your Own Notes
Nutrition
All nutrition information is provided by a third party and is an estimate only. Use your own nutritional calculator for more specific measurements.
Lori says
Made this for a friend’s birthday. It was an absolute home run for taste and presentation! It’s not overly sweet, which everyone complimented on, and the creaminess of the cake. This is definitely a keeper! Thanks for a great cheesecake recipe.
Misty says
Hi Lori, so glad you enjoyed it! Thank you for taking the time to leave a review, it genuinely helps us be able to create more recipes.
Kellie Brown says
This was the best cheese cake I ever made! My Mother and Brother loved it too.
Now I would like to try using Blueberries, is it ok to follow this recipe for it? Thank you for your quick
response as I would like to make this evening 1/4/25.
Misty says
Hi Kellie! I am so glad you liked it! I have never made it with blueberries, but I think it should work just fine! Blueberries don't fall apart quite as easily, so you may just need to cook the sauce a tiny bit extra and press it with a spoon through the strainer to get out all the yummy juices. We'd love to hear how it turns out!
Kellie Brown says
Really awesome Recipe! Can I use same recipe only using blueberries?
Jen P says
I would give this 1 stars if I could. Best cheesecake I have ever made ! And the instructions were so great and helpful!
Danielle says
This feedback makes our day! So happy you were able to find success with this recipe! Maybe you meant "10 stars" not "1 star"? Hehe!
Mikaela Mitchell says
I am so blonde do you have any photos of the water bath method I get how to cover the pan but no more.
Thank you
Danielle says
We do not have photos of the water bath, but we have added them to our list of photos when we retake picture of this post. Here is a post with exact instructions. https://handletheheat.com/cheesecake-water-bath/. If you have any other questions, please let us know!
Alex Fosse says
I thank you for your insight. Nice to know when someone actually knows what they are doing and isn't plagiarizing others recipes. I have been making cheesecake for 12 years. May I suggest a large pan of boiling water placed on the rack below the cheesecake while cooking. I have had much success with this method. Opening the door after turning off the heat then closing the door is a good way to even out the heat and cool slowly to reduce cracking. Just don't forgot the cake in the oven overnight. I plan on trying this cake on my chemistry students in two days. Looks yummy.
Misty says
Hi Alex, we have used that method before and really like it. Thank you for sharing! We hope you enjoy this recipe.
Alex Fosse says
This cake has made it into the back of the recipe book where I keep my best cheesecake recipes. My next goal is to acquire some oregon blackberries to pair with this cheesecake. Something that I did different was to leave the lemon juice out of the cheesecake. This was an accident but the keep was super delicious anyway. May I send you a picture of the cake I made? Sometimes it helps people to see a different perspective.
Misty says
We're so happy to hear that! We would love to see how yours turned out. The best way to share a picture would be to post on Instagram and tag us @borrowedbites or share a picture on Pinterest here: https://www.pinterest.com/pin/810507264200551062/. Thanks for sharing!
Lindsay says
Am I supposed to remove the cream from the oreos before I blend to make the crust?
Danielle says
You do not remove the cream from the Oreos before making the crust. Hope that helps!
Karen says
I’ve made this cheesecake several times. It is the best cheesecake recipe I’ve ever used.
For winter, I’m going to try pears instead of blackberries. I’ll make a pear jam with pears, lemon and honey and strain it through mesh sleeve. I’ll swirl this through the cheesecake then decorate the top of the cheesecake with pear slices instead of blackberries.
Karen says
And I’ll substitute gingersnaps for the lemon oreos.
Misty says
We love hearing how much you enjoy it! Thanks for taking the time to share. Let us know how the pear version goes!
Sara Smitn says
I have NEVER made a cheesecake before - ever! I read this recipe and knew I just had to try it. Berries and lemon - a combination that can’t be beat. I was intimidated though. However the directions and tips in this recipe were spot on and so very detailed and helpful. My cheesecake came out amazing and the whole family loved it at our Easter lunch!! I will definitely be making this again - especially since I can freeze it and enjoy one slice at a time whenever I’m in the mood! 😁
Danielle says
This is a favorite combination of ours as well, and so very happy to hear that all the tips were helpful! Having some in the freezer sounds dangerous!😉 If I were you I would be sure to label the slices "kale" to keep the rest of the family away.😆