


I can't imagine an Easter or Christmas dinner in our family without these Scalloped Potatoes. After enjoying them for so many years in our own kitchen, we finally shared the recipe with our readers, and it has easily become on of our most popular holiday recipes (it has over 60 five-star reviews!). They are creamy, cheesy, and really flavorful! But what we love about them most is that they are an amazing make-ahead side dish.
If you still have more potatoes on hand, try more of our favorites in our collection of Potato Recipes.

Our infatuation with this classic dish began many years ago when we found them in our Cook's Illustrated Cookbook. Over time we have altered the recipe to find the quickest way to make them, as well as the best way to make the sauce as cheesy as possible.
It started as one of our highly requested Easter Recipes, but has now also become a Christmas dinner and Thanksgiving Recipes staple, as well as one of my go-to make-ahead potato side dish options whenever I am serving a crowd.
Recipe Notes from Danielle & Misty
Scalloped potatoes are simpler than you might imagine, but a few things can go wrong. We've fine-tuned this recipe to solve the problems we encountered in our own kitchen.
No brown potatoes: Simmering the slices of potatoes in a sauce before baking keeps them from turning brown.
Cheesy sauce: Instead of adding it only on top like traditional recipes, we add it straight to the sauce so that every bite is cheesy.
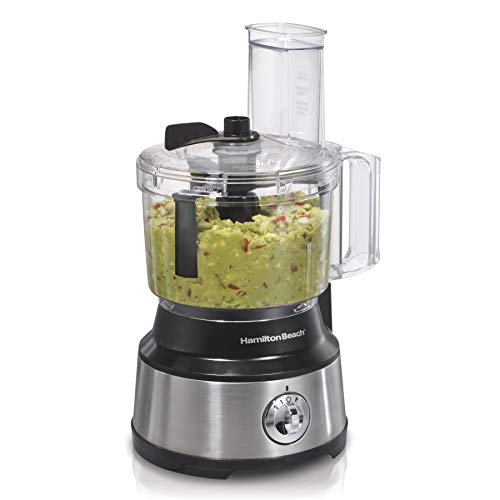
Faster prep: We use a food processor to cut down on the lengthy slicing, dicing, and shredding! It also helps the potatoes cook more evenly since they are uniform in size.
Gluten free: We made a sauce that has no need of flour for thickening!
"This was the absolute best scalloped potato recipe our family has ever tried. Super easy and turned out beautifully. Even our "not usual potato eaters" loved them. High praise for this recipe! Will now be a family staple on the menu."
⭐⭐⭐⭐⭐ - Melissa
Ingredients for cheesy scalloped potatoes
I won't go on and on, but there are a few ingredient notes I want to share that have been helpful for us in mastering this recipe.

- Thyme: This might seem like a non-essential ingredient, but we have skipped the thyme before and really regretted it. It genuinely adds flavor that gives it an edge up from other recipes. Fresh thyme leaves are best but you may substitute 1 teaspoon of dried thyme in a pinch.
- Russet potatoes: These are the perfect potatoes to use in scalloped potatoes because of their level of starchiness. If you use yukon gold or red potatoes, the sauce may not get thick enough.
- Chicken broth: This adds much more flavor than water without making the sauce too heavy. You really shouldn't substitute it.
- Heavy cream: To make the sauce rich and creamy, you need the fat content found in heavy cream. Whole milk or half and half will not be thick enough for this recipe.
- Cheese: I suggest using sharp cheddar for the most flavor, but we have also used regular cheddar succesfully.
Helpful kitchen tools
Ceramic 9x13 Baking DishFarberware 8Qt PotFood ProcessorGlass Measuring Cup Set



How to make cheesy scalloped potatoes
Before cooking, start by chopping and shredding all of the necessary ingredients. We do this in the food processor because it makes it so much faster! But if you don't have one, each step may be done with a sharp knife or mandoline slicer and cheese grater.

- In a food processor (affiliate) fit with a chopping blade, pulse large chunks of onion until evenly minced. Empty the food processor and rinse it out.
- Insert the ¼ inch slicing disk into the food processor. Putting one potato into the feed tube at a time, slice them all evenly. Empty the processor and rinse thoroughly.
- Insert the shredding disk into the processor. Shred all the cheese.
Heat a deep pot over medium to medium-high heat. Melt the butter. Once the butter is melted, add in the minced onion and cook until soft, which is about 4 minutes. Then add in the garlic, thyme, salt & pepper. Cook for approximately 30 seconds. Pour in the chicken broth and then the heavy cream.
At this point if I think the onions are too large (some people in the family don't care for the texture of onion) I will put a stick blender in the pot and blend until almost smooth. This is a completely optional step.
Now it is time to add in the potato slices and bay leaves. Bring to a simmer and cook, stirring occasionally, until the potatoes are tender, approximately 10 minutes.

Discard the bay leaves and stir in the cheddar cheese. Mix the cheesy cream sauce thoroughly until all the cheese is melted.
If serving immediately, pour the cheesy scalloped potatoes into a greased 9 x 13-inch baking dish and bake at 425 degrees oven for 15 minutes. If making ahead, see the section below.
Make ahead instructions
Once the potatoes are in the greased 9x13 pan, allow them to cool completely. Wrap with a layer of plastic wrap and then a layer of aluminum foil. Refrigerate for up to 3 days or freeze for up to 3 months.
After freezing, allow the potatoes to fully thaw in the refrigerator. This can take 24+ hours, so give them plenty of time.
Once thawed, remove the potatoes from the refrigerator an hour before baking and let them begin to come to room temperature. Remove the layer of plastic wrap, but replace the tinfoil layer. Cook for the first 30 minutes with the tinfoil on and the last 20-30 minutes with the foil off.
They hold well for at about an hour so I put them in the oven extra early just in case they need a few extra minutes baking time to heat thoroughly.

How to double or triple this recipe
When making these cheesy make ahead scalloped potatoes for a crowd, here are a couple tips.
- If you double the recipe and put it into a larger casserole dish, they will take longer to bake. Be sure to give yourself up to an extra half an hour just to be safe. Or put each batch into a prepared baking dish and bake as directed. It's absolutely not necessary but if you like pretty serving dishes like I do, this white one (affiliate) has become a favorite.
- The potatoes brown very quickly, so when I am doubling or tripling the recipe I like to get the broth and cream heating before slicing the potatoes. That way I can add them directly from the food processor into the pot of liquid.

Tips & Tricks
- Move quickly after prepping the potatoes or they will discolor.
- If slicing by hand, be sure to slice potatoes in an even thickness so that they cook evenly.
- Before baking from frozen, make sure the dish is fully thawed or the edges will get done before the middle.
More recipes
Looking for other recipes? Try these:
Recipe

Cheesy Scalloped Potato Recipe
Ingredients
- 2 tablespoon butter
- 1 small onion minced
- 2 garlic cloves minced
- 1 tablespoon fresh thyme leaves
- 1 teaspoon kosher salt
- ½ teaspoon pepper
- 2½ pounds russet potatoes washed and peeled
- 1 cup chicken broth
- 1 cup heavy cream
- 2 bay leaves
- 5 ounces cheddar cheese shredded
Instructions
Make-Ahead Instructions
- Spray 9x13 baking pan with nonstick spray.
- In a food processor, mince onion, slice potatoes ¼ inch thick, and shred cheese, making sure to clean out the processor bowl in between ingredients.
- Melt butter over medium to medium-high heat in a deep pot. Add onion and cook for 4 minutes or until soft.2 tbsp butter, 1 small onion
- Add garlic, thyme, salt, and pepper. Cook for 30 seconds.2 garlic cloves, 1 tbsp fresh thyme leaves, 1 tsp kosher salt, ½ tsp pepper
- Add broth and cream. *Optional: If the onion is too chunky for your preference use an immersion blender to blend until mostly smooth.1 cup chicken broth, 1 cup heavy cream
- Add potatoes and bay leaves. Simmer, then cover and simmer stirring occasionally, until potatoes are tender, approximately 10 minutes.2½ pounds russet potatoes, 2 bay leaves
- Discard bay leaves. Add cheese and stir until the cheese is fully melted. Pour into greased 9x13 pan.5 ounces cheddar cheese
- NOTE: If baking immediately without refrigerating or freezing first, jump down to the "Baking Immediately Instructions." If making ahead, continue with the next step.
- Once the potatoes are in the greased 9x13 pan, allow them to cool completely. Wrap with a layer of plastic wrap and then a layer of tinfoil. Refrigerate for up to 3 days or freeze for up to 3 months.
- If frozen, allow the potatoes to fully thaw in the refrigerator before serving day. This can take 24 hours so give them plenty of time. Once thawed, move to next step.
- Remove the potatoes from the refrigerator an hour before baking and let them begin to come to room temperature. Remove the layer of plastic wrap, but replace the tinfoil layer. Cook for 50-60 minutes at 425°F, the first 30 minutes with the tinfoil on, and the last 20-30 minutes with the foil off. Allow to cool for 10 minutes before serving.
Baking Immediately Instructions
- Preheat oven to 425°F.
- Follow steps 1-7 above.
- Once the potatoes are poured into the greased pan, bake for 15-20 minutes. Allow to cool for 10 minutes before serving.
Video
Notes
- Move quickly after prepping the potatoes or they will discolor.
- If slicing by hand, be sure to slice potatoes in an even thickness so that they cook evenly.
- Before baking from frozen, make sure the dish is fully thawed or the edges will get done before the middle.
Add Your Own Notes
Nutrition
All nutrition information is provided by a third party and is an estimate only. Use your own nutritional calculator for more specific measurements.


Bonnie says
I gave this recipe 5 stars even though I have not made it yet. I have been cooking and baking for over 50 years and I can usually spot a good recipe. I cannot wait to make this and I especially like that I can make it up to 3 days ahead. This is great for the holidays if only for that reason alone! I usually make mashed potatoes and stuffing/dressing a couple of days ahead , so this fits right in with my game plan to make holidays a little easier since I cook and host all the major ones plus a friends and family bbq every Memorial Day. Thank you for this recipe, I can’t wait to try it once the weather cools!
Misty says
I hope you love it, Bonnie! It's a recipe that's honestly become a family tradition - we love it!
Linda Sitlinger says
My family loved this as a side dish, yum!
Misty says
That makes us so happy to hear, Linda! It's one of our longest family-favorites. Thanks for taking the time to share!
Shirin says
I made that for Christmas. My family absolutely love it. Thank you for the great recipe.
Misty says
We're so glad you loved them, Shirin!
Tabbitha Jones says
Perfectly delicious every time! I always make them ahead of time a day or many hours and the dish takes an hour. Yummy and there’s never any left😁
Danielle says
We love reading comments like this! So glad you love them like we do and thanks for a taking a minute to tell us. Happy eating!