


I can't imagine an Easter or Christmas dinner in our family without these Scalloped Potatoes. After enjoying them for so many years in our own kitchen, we finally shared the recipe with our readers, and it has easily become on of our most popular holiday recipes (it has over 60 five-star reviews!). They are creamy, cheesy, and really flavorful! But what we love about them most is that they are an amazing make-ahead side dish.
If you still have more potatoes on hand, try more of our favorites in our collection of Potato Recipes.

Our infatuation with this classic dish began many years ago when we found them in our Cook's Illustrated Cookbook. Over time we have altered the recipe to find the quickest way to make them, as well as the best way to make the sauce as cheesy as possible.
It started as one of our highly requested Easter Recipes, but has now also become a Christmas dinner and Thanksgiving Recipes staple, as well as one of my go-to make-ahead potato side dish options whenever I am serving a crowd.
Recipe Notes from Danielle & Misty
Scalloped potatoes are simpler than you might imagine, but a few things can go wrong. We've fine-tuned this recipe to solve the problems we encountered in our own kitchen.
No brown potatoes: Simmering the slices of potatoes in a sauce before baking keeps them from turning brown.
Cheesy sauce: Instead of adding it only on top like traditional recipes, we add it straight to the sauce so that every bite is cheesy.
Faster prep: We use a food processor to cut down on the lengthy slicing, dicing, and shredding! It also helps the potatoes cook more evenly since they are uniform in size.
Gluten free: We made a sauce that has no need of flour for thickening!
"This was the absolute best scalloped potato recipe our family has ever tried. Super easy and turned out beautifully. Even our "not usual potato eaters" loved them. High praise for this recipe! Will now be a family staple on the menu."
⭐⭐⭐⭐⭐ - Melissa
Ingredients for cheesy scalloped potatoes
I won't go on and on, but there are a few ingredient notes I want to share that have been helpful for us in mastering this recipe.

- Thyme: This might seem like a non-essential ingredient, but we have skipped the thyme before and really regretted it. It genuinely adds flavor that gives it an edge up from other recipes. Fresh thyme leaves are best but you may substitute 1 teaspoon of dried thyme in a pinch.
- Russet potatoes: These are the perfect potatoes to use in scalloped potatoes because of their level of starchiness. If you use yukon gold or red potatoes, the sauce may not get thick enough.
- Chicken broth: This adds much more flavor than water without making the sauce too heavy. You really shouldn't substitute it.
- Heavy cream: To make the sauce rich and creamy, you need the fat content found in heavy cream. Whole milk or half and half will not be thick enough for this recipe.
- Cheese: I suggest using sharp cheddar for the most flavor, but we have also used regular cheddar succesfully.
Helpful kitchen tools
Ceramic 9x13 Baking DishFarberware 8Qt PotFood ProcessorGlass Measuring Cup Set



How to make cheesy scalloped potatoes
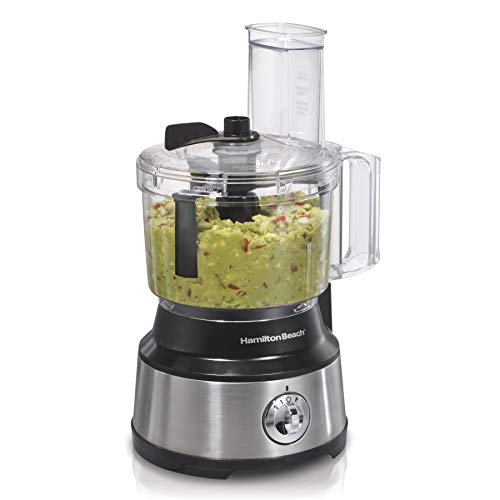
Before cooking, start by chopping and shredding all of the necessary ingredients. We do this in the food processor because it makes it so much faster! But if you don't have one, each step may be done with a sharp knife or mandoline slicer and cheese grater.

- In a food processor (affiliate) fit with a chopping blade, pulse large chunks of onion until evenly minced. Empty the food processor and rinse it out.
- Insert the ¼ inch slicing disk into the food processor. Putting one potato into the feed tube at a time, slice them all evenly. Empty the processor and rinse thoroughly.
- Insert the shredding disk into the processor. Shred all the cheese.
Heat a deep pot over medium to medium-high heat. Melt the butter. Once the butter is melted, add in the minced onion and cook until soft, which is about 4 minutes. Then add in the garlic, thyme, salt & pepper. Cook for approximately 30 seconds. Pour in the chicken broth and then the heavy cream.
At this point if I think the onions are too large (some people in the family don't care for the texture of onion) I will put a stick blender in the pot and blend until almost smooth. This is a completely optional step.
Now it is time to add in the potato slices and bay leaves. Bring to a simmer and cook, stirring occasionally, until the potatoes are tender, approximately 10 minutes.

Discard the bay leaves and stir in the cheddar cheese. Mix the cheesy cream sauce thoroughly until all the cheese is melted.
If serving immediately, pour the cheesy scalloped potatoes into a greased 9 x 13-inch baking dish and bake at 425 degrees oven for 15 minutes. If making ahead, see the section below.
Make ahead instructions
Once the potatoes are in the greased 9x13 pan, allow them to cool completely. Wrap with a layer of plastic wrap and then a layer of aluminum foil. Refrigerate for up to 3 days or freeze for up to 3 months.
After freezing, allow the potatoes to fully thaw in the refrigerator. This can take 24+ hours, so give them plenty of time.
Once thawed, remove the potatoes from the refrigerator an hour before baking and let them begin to come to room temperature. Remove the layer of plastic wrap, but replace the tinfoil layer. Cook for the first 30 minutes with the tinfoil on and the last 20-30 minutes with the foil off.
They hold well for at about an hour so I put them in the oven extra early just in case they need a few extra minutes baking time to heat thoroughly.

How to double or triple this recipe
When making these cheesy make ahead scalloped potatoes for a crowd, here are a couple tips.
- If you double the recipe and put it into a larger casserole dish, they will take longer to bake. Be sure to give yourself up to an extra half an hour just to be safe. Or put each batch into a prepared baking dish and bake as directed. It's absolutely not necessary but if you like pretty serving dishes like I do, this white one (affiliate) has become a favorite.
- The potatoes brown very quickly, so when I am doubling or tripling the recipe I like to get the broth and cream heating before slicing the potatoes. That way I can add them directly from the food processor into the pot of liquid.

Tips & Tricks
- Move quickly after prepping the potatoes or they will discolor.
- If slicing by hand, be sure to slice potatoes in an even thickness so that they cook evenly.
- Before baking from frozen, make sure the dish is fully thawed or the edges will get done before the middle.
More recipes
Looking for other recipes? Try these:
Recipe

Cheesy Scalloped Potato Recipe
Ingredients
- 2 tablespoon butter
- 1 small onion minced
- 2 garlic cloves minced
- 1 tablespoon fresh thyme leaves
- 1 teaspoon kosher salt
- ½ teaspoon pepper
- 2½ pounds russet potatoes washed and peeled
- 1 cup chicken broth
- 1 cup heavy cream
- 2 bay leaves
- 5 ounces cheddar cheese shredded
Instructions
Make-Ahead Instructions
- Spray 9x13 baking pan with nonstick spray.
- In a food processor, mince onion, slice potatoes ¼ inch thick, and shred cheese, making sure to clean out the processor bowl in between ingredients.
- Melt butter over medium to medium-high heat in a deep pot. Add onion and cook for 4 minutes or until soft.2 tbsp butter, 1 small onion
- Add garlic, thyme, salt, and pepper. Cook for 30 seconds.2 garlic cloves, 1 tbsp fresh thyme leaves, 1 tsp kosher salt, ½ tsp pepper
- Add broth and cream. *Optional: If the onion is too chunky for your preference use an immersion blender to blend until mostly smooth.1 cup chicken broth, 1 cup heavy cream
- Add potatoes and bay leaves. Simmer, then cover and simmer stirring occasionally, until potatoes are tender, approximately 10 minutes.2½ pounds russet potatoes, 2 bay leaves
- Discard bay leaves. Add cheese and stir until the cheese is fully melted. Pour into greased 9x13 pan.5 ounces cheddar cheese
- NOTE: If baking immediately without refrigerating or freezing first, jump down to the "Baking Immediately Instructions." If making ahead, continue with the next step.
- Once the potatoes are in the greased 9x13 pan, allow them to cool completely. Wrap with a layer of plastic wrap and then a layer of tinfoil. Refrigerate for up to 3 days or freeze for up to 3 months.
- If frozen, allow the potatoes to fully thaw in the refrigerator before serving day. This can take 24 hours so give them plenty of time. Once thawed, move to next step.
- Remove the potatoes from the refrigerator an hour before baking and let them begin to come to room temperature. Remove the layer of plastic wrap, but replace the tinfoil layer. Cook for 50-60 minutes at 425°F, the first 30 minutes with the tinfoil on, and the last 20-30 minutes with the foil off. Allow to cool for 10 minutes before serving.
Baking Immediately Instructions
- Preheat oven to 425°F.
- Follow steps 1-7 above.
- Once the potatoes are poured into the greased pan, bake for 15-20 minutes. Allow to cool for 10 minutes before serving.
Video
Notes
- Move quickly after prepping the potatoes or they will discolor.
- If slicing by hand, be sure to slice potatoes in an even thickness so that they cook evenly.
- Before baking from frozen, make sure the dish is fully thawed or the edges will get done before the middle.
Add Your Own Notes
Nutrition
All nutrition information is provided by a third party and is an estimate only. Use your own nutritional calculator for more specific measurements.



Anita Nusbaum says
I trippled the recipe and had to throw out the first batch because of scorching on the bottom of the pan. Unfortunately the scorching permeated throughout the entire batch. Be careful when you simmer the potatoes in the sauce
The second time I boiled the potatoes in water and drained them. This caused some of them to disintegrate. I made the sauce separately and was careful to only add the potatoes when the sauce was complete and off of the heat.
The final product tastes great but the slices are not uniform and some have disintegrated into small particles.
Misty says
Hi Anita. I am sorry you had this experience. We would love to help you troubleshoot because this is a long time family-favorite recipe and we would love for you to have the same great experience we have! Whenever you're cooking with milk or cream, it is important to ensure the heat isn't too high and keep the food moving to avoid scorching. I would suggest turning the heat down until the potatoes are truly cooking at just a simmer, and then stir occasionally (every 2-3 minutes). This should keep the sauce from scorching.
We do not recommend boiling the potatoes first because boiled potatoes disintegrate. We suggest cooking them as directed in the recipe.
We hope these tips help. Thank you for taking the time to share your experience!
Tabbitha Jones says
Delicious and easy every time 😁
Misty says
We're so glad you enjoyed these, Tabbitha!
Janice says
I made these before ,they were delish !
this time I decided to make ahead ,but I don't have an hour to bake them due to turkey in oven
can I store them in fridge in kettle,and reheat on stovetop ,and then only have to bake 15-20 min ?
Misty says
Hi Janice! We've definitely experiened the struggle with oven space! If you mean that you would like to store them in a saucepan, we haven't tried it ourselves. If you try it, I would suggest warming them very gently because they may burn easily over direct heat. I would also very carefully stir them every once in a while to help them warm through. If you stir too often, the potatoes may break apart. A wider sauce pan will be better than a tall and narrow one in this case. I hope this helps! Happy Thanksgiving!
Janice says
not sure if sent
I put them in pan ,felt the pot would break or clump them in reheating
I am thinking of getting them out of fridge early setting on top of stove which will be hot from oven this may lower bake time
happiest Thanksgiving
Sashur says
Hello, if I want to scale this up for 36 people, can I do two containers of 18 servings each and still get a good result? Or should I do 4 containers of 9 servings? I just want them to cook evenly for my wedding.
Danielle says
Congratulations on your wedding! You can get great results by doing two containers of 18 servings. The key to doing this successfully is to use a pan that is essentially the size of two 9x13 pans. If you use a smaller pan, the potatoes will be extra deep which means it will take them a lot longer to cook through. I hope that helps, but if you have any more questions, please feel free to ask.
Sashur says
Thank you! Should I allow for additional cooking time if I have them in 9x13?
Danielle says
If you were only cooking one pan, I would say no. However, if you are baking more than one pan, I would allot extra time for baking.
Angel says
I cook for my church elders once a month. I usually get items in advance from our church food pantry. We were blessed with A LOT of potatoes recently. I want to make this recipe. I don't mind using several baking dishes, but I rather make two large alumini pans from the Dollar Tree. I need to prep this dish soon, as I don't want the potatoes to spoil before next month (4 weeks). I've read many horror stores of the double batches turning black. I also read that frozen potato casseroles should go from freezer straight to oven or they turn black and mushy. You advise to defrost the casserole and THEN heat for at least in the oven. I'm confused and do not want 25 starving people. Thank you.
Danielle says
I am happy to help as these potatoes are perfect for this application. Every year I make these for Easter, and I always make them ahead and freeze them weeks in advance as it helps hosting go more smoothly. The large aluminum baking pans from Dollar Tree will work just fine. Just know that they come in a various thicknesses. If they are in a deep pan, it will take longer for them to bake. Just something to keep in mind. As far as the potatoes turning black, that occurs for two different reasons. First, because they are exposed to air too long before being added to the sauce. To be extra careful, I would make the sauce through step 5, and then slice the potatoes and add them directly to the sauce. The goal is to be organized and move quickly in order to minimize exposure of the potatoes to the air. Secondly, they discolor when the tinfoil on the top interacts with the sauce. That is why we recommend a layer of plastic wrap that touches the potatoes before the foil. FOr whatever reason, the aluminum pan does not seem to cause the discoloration, only the tinfoil itself.
As far as cooking them from frozen, that takes forever. Over the decades that I have been making these, I have discovered that it is easier to thaw them (covered) in the refrigerator before baking. They do not turn black because the potatoes are par cooked in the sauce before being frozen. I hope this helps. If you have any other questions, please feel free to ask! We would love to hear how they turn out!
Pam says
Why are baking times so much longer for after the dish has been frozen?
Just made it, haven't baked it yet, so can't rate it.
Danielle says
Hello! The baking time is so much longer after freezing or refrigerating them because they start out cold. It takes longer for them to cook through compared to baking right away. I hope that helps. Please feel free to ask if you have any more questions.
LC LOGGINS says
Considering making these to supplement the frozen dinners I prepare for my son in college, I usually make him seven to eight dinners with meat, veggies, rice or potato dish. I seal and freeze these and deliver to him about every two week - his college is only about 70 miles away! This helps to defray the costly meal plans available to him, but of course he relies on being able to microwave these meals. You recommend oven warming for these when frozen. Do you think it's possible to warm these potatoes in the microwave without turning them into a mush?
Danielle says
Your son is so lucky! These can absolutely be made ahead and then microwaved. The only thing I would note is that the potatoes should be fully cooked before being frozen. Follow the "Baking Immediately" instructions, allow to cool, and then freeze. Otherwise the potatoes won't be fully cooked and the microwave time is not sufficient to complete the necessary cooking time. I hope that helps! Please feel free to ask any other questions.
Melissa Ewing says
This was the absolute best scalloped potato recipe our family has ever tried. Super easy and turned out beautifully. Even our “not usual potato eaters” loved them. High praise for this recipe! Will now be a family staple on the menu. Love the tips for making ahead, definitely helped save time on a busy birthday weekend.
Misty says
LOVE to hear that! Makes our day when you love our true family favorites. Thanks for sharing!
Lorraine says
I wanted to add to my review, but there is no edit feature. It took awhile to peel and slice the potatoes. I used a salad shooter to slice the potatoes. I cooked the potatoes in the cream, placed the potatoes in the refrigerator overnight. When I removed the pan of potatoes the next day some of the potatoes turned black. So, the double batch I made went in the trash.
Danielle says
I am so sorry to hear that you didn't find success with this recipe. I would love to help troubleshoot as this is one of our most raved recipes plus one I have been making personally for over 10 years, so I am confident it works. The potatoes will only turn black if left to the air for too long. In the tips section it reminds you to move quickly one the potatoes are peeled and sliced. They should not need any water or drying before adding to the cream mixture. Did you mix the cheese into the cream before refrigerating? And did you place plastic wrap on top of the potatoes once they were poured into the baking dish? The plastic wrap is essential for keeping the air off the potatoes in order that they don't turn black. Again, so sorry this happened to you, but hopefully this helps you understand what might have gone wrong. If you have any other questions please feel free to ask.
Lorraine says
I really wanted to like this recipe. However it didn’t turn out. I doubled the recipe and I think rinsing the potatoes and making sure
Potatoes are dry would help before adding to the cream. Or better yet parboil potatoes, dry with paper towels before mixing with cream. My potatoes turned black and I had to throw them away. I think adding hints to the recipe itself would help.
Danielle says
Hello! I am responding to this under your second comment.
Lorraine says
Thank you for responding so quickly. I’m going to try the scalloped potatoes recipe again. I will let you know how it goes. I’m sure it was an error on my part.
Danielle says
We genuinely want to help in any way that we can, so please let us know if you run into any questions. When you do try again, we would love to know how they turn out.
Sami says
Great recipe. First time I tried making scalloped potatoes ahead they turned out black, so disappointing. Now you showed me a way to avoid it. Making these for my son's birthday dinner, a day ahead so it's ready to go. Thankyou
Danielle says
So glad to hear! Enjoy!
Helen says
I followed the recipe except I omitted the bay leaves. Made on Saturday morning, I baked Sunday at 3 pm. EXCELLENT. No fail, make ahead potatoes!
Danielle says
So happy to hear that! Thank you for taking the time to leave your feedback!
Shona says
Can these be made ahead and re-heated in a crock pot?
Misty says
Hi Shona! Yes, you can do that. They would need to be reheated on low for at least 4 hours, or until it's heated through. You could very gently stir them part way through if needed. I would put a dish towel over the crockpot and then put the lid on top (so the towel is in between the pot and the lid) to help catch the extra condensation and prevent watery potatoes. Hope this helps!
Claudia says
Five Stars All Gold!!
I made these ahead the first time (almost ate them out of the pan after the simmer stage...Yum!
Making them again right now & baking immediately. Do they really only need 15-20 min.?
I am planning on reheating in the morning. We thought they were even better the second day!
Thank you for a fabulous recipe.
Danielle says
Good question! If you bake them while they are hot, the bake time is significantly shorter. When they are baked after being chilled, it takes longer for them to get hot and then finish cooking through. Thank you so much for taking the time to let us know how much you enjoy them! Happy eating!
Phyllis Provo says
Danielle and Misty, I just made this for the first time today. I will bake it and serve it tomorrow, along with a ham and other trimmings. I have dear friends flying in tomorrow morning from afar, so this is just the "ticket", as it will allow me to spend time visiting with them rather than spending hours in the kitchen. I absolutely love the idea of make-ahead potatoes, because usually the browning issue stops that. This recipe solves that problem! I will let you know tomorrow how it turns out, but I have no doubt it will be wonderful. The sauce smells so delicious, and the potatoes are lovely and tender. So no doubt it will be yummy tomorrow! Thank you for this recipe, which I am certain will be a hit! They always expect good food from me, and I love to deliver!!
Misty says
We're so glad to hear that! That is exactly why we like to have make-ahead potato options as well. Enjoy the time with your friends and we hope you enjoy the potatoes!