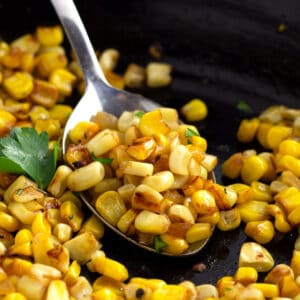
Get ready to learn how make roasted corn the easy way! Quickly caramelize whole corn kernels alongside onions and garlic for a side dish on the stovetop that is fast enough for weeknights. Plus it uses frozen corn which means this can be ready to eat in just 20 minutes all year long!
Roasted corn is one of our many favorite Vegetable Side Dish Recipes that keeps everyone healthy and happy!
When life gets on the crazy side my meal planning can get a little shoddy. I can't be the only mother that plans the main dish but forgets about the sides, right? Since I know this about myself, I try to keep ingredients around for some simple side dishes, like this Moist Buttermilk Cornbread, these Garlic Parmesan Roasted Carrots, or this Oven Roasted Broccoli.
This Roasted Corn recipe is one of the sides I turn to a lot. It's the best way to eat sweet summer corn. Better than a fresh ear of corn, better than oven roasted corn, better than Mexican Street Corn... and yes, better than that store bought version from Trader Joe's. It's a frozen corn recipe that will steal the show!
Skip to:
🏅 Why this recipe is great
- Flavorful! There is absolutely nothing boring about roasted corn. It takes on all the caramelized flavors of the onion and garlic.
- Fast and easy. Just keep frozen corn kernels on hand and you have a delicious, quick side dish ready in 20 minutes.
- Fits every occasion. Roasted corn is easy enough for a weeknight, delicious enough to serve to guests, and simple enough to feed to a crowd.
- Better than your corn on the cob recipe. Whole corn kernels are faster to cook on the stovetop and easier to eat than a corn cob. Plus no need to shuck fresh corn.
- Saves space in the oven. Oven-roasted corn is good, but cooking it on the stovetop saves space in the oven for everything else.
- Any time of year. Fresh summer corn-on-the-cob is delicious, but frozen corn can be made all year long! Plus it's a great alternative to grilling. Add it to your list of Easter recipes or Thanksgiving recipes for an easy holiday side dish.
🌽 Ingredients for roasted corn
This roasted corn recipe only calls for 5 simple ingredients, most of which you probably have on hand already.
Onion: Yellow, brown, or sweet onion.
Garlic: I prefer buying minced garlic because it's easier and faster than mincing your own. I suggest using real garlic over garlic powder.
Butter: We use regular salted butter, but unsalted will work as well. Adjust the seasoning at the end to your liking.
Olive oil: Virgin or extra virgin will work, but EVOO will impart a better flavor. Feel free to substitute with vegetable oil or canola oil.
Whole corn kernels: This recipe uses frozen corn kernels (yellow, white or sweet corn). White kernels are usually a bit more tender while the yellow have a slightly more corny flavor. Yellow are the easiest to find in the grocery store.
🔪 How to make roasted corn
Cooking frozen corn on the stove top is as easy as three steps! It is my favorite way of cooking corn. There are several methods, but for the best results, read my tips below each step.
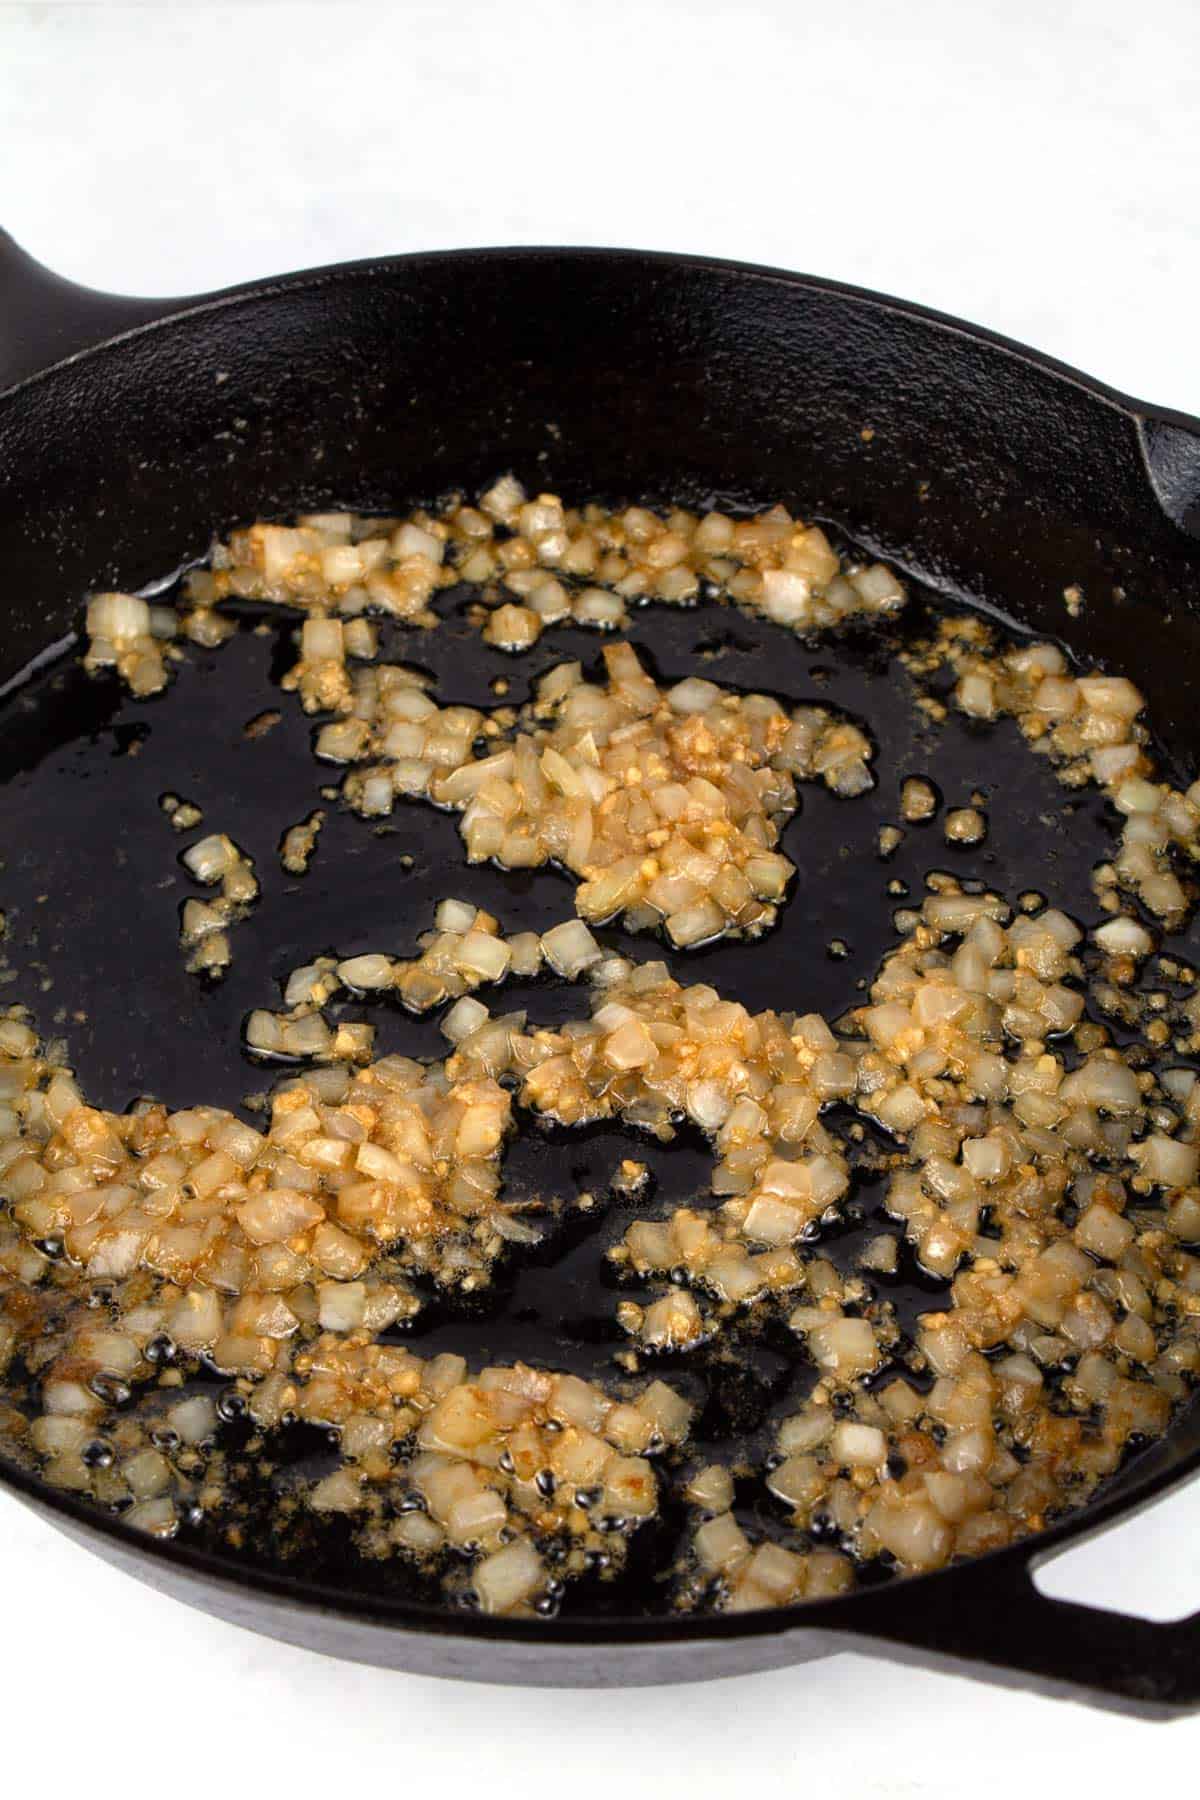
Sauté aromatics: Heat a 12-inch skillet over medium-high heat. Add the butter and oil, then sauté the onions and garlic until they are fragrant and translucent, 2-3 minutes.
- I prefer using a cast iron skillet (affiliate) over a non-stick skillet because it holds heat better, resulting in more caramelized corn kernels.
- Make sure the skillet is 12 inches in order to not overcrowd the pan.
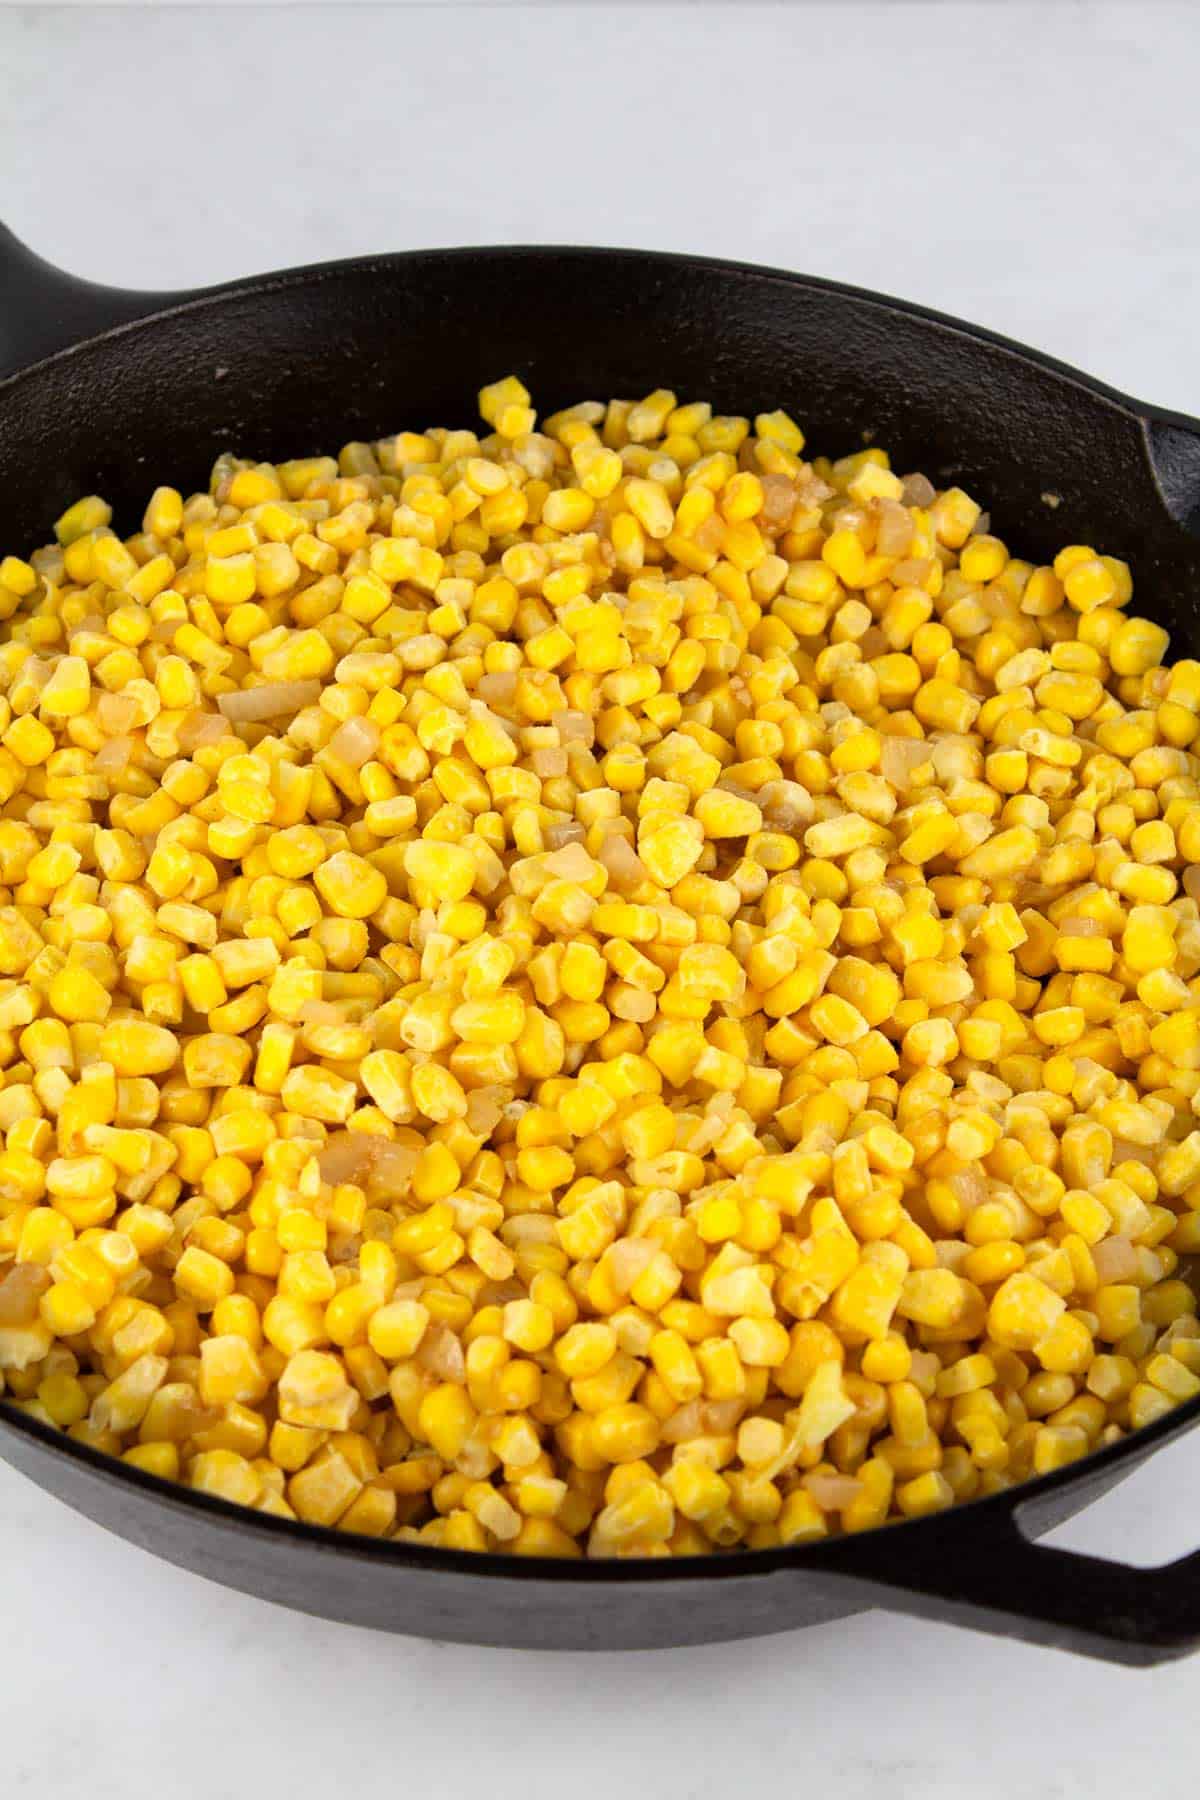
Add frozen corn: Get the pan super hot before adding the corn. Then add the frozen corn kernels and roast in a single layer, stirring occasionally.
- If the pan isn't hot enough, the corn will steam instead of caramelizing. So don't be afraid to get it screaming hot!
- Only stir the corn occasionally. If you stir too often it won't have the chance to caramelize.
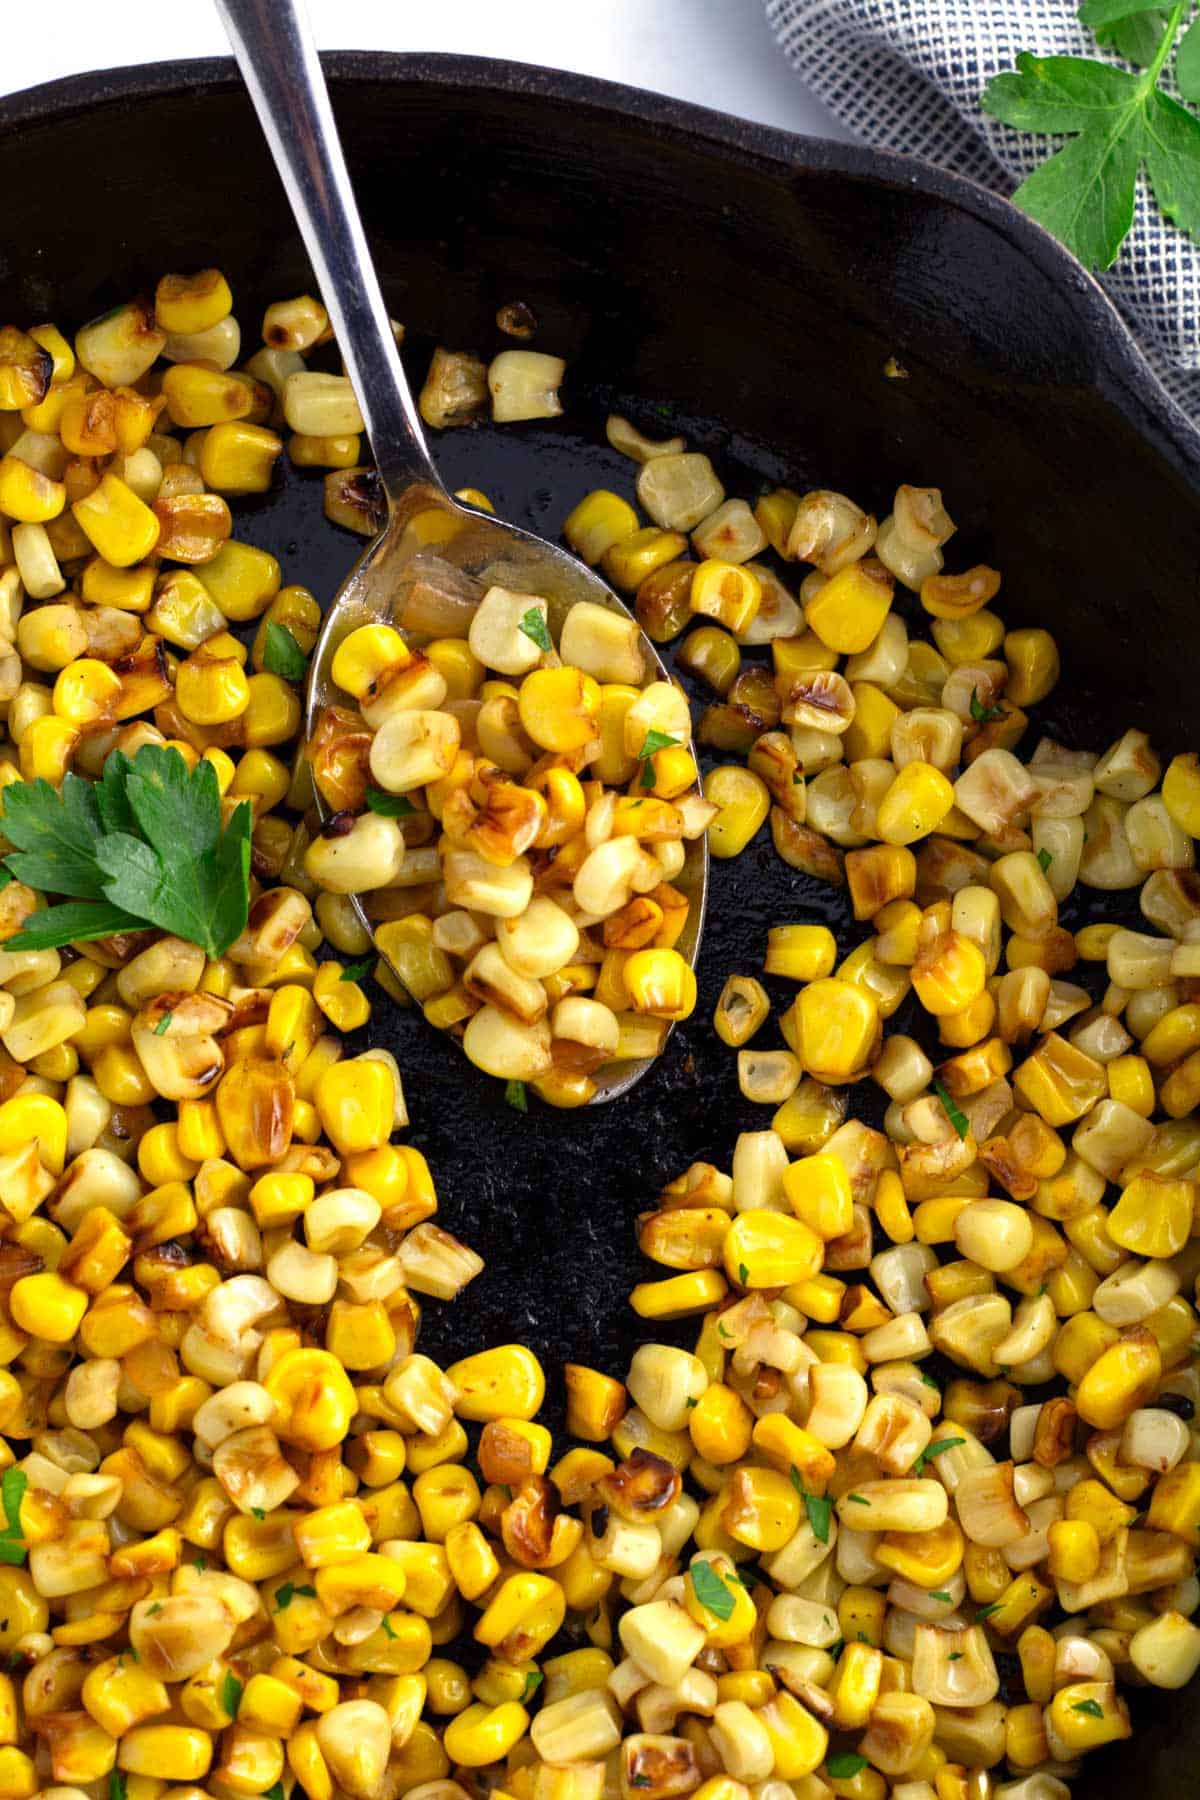
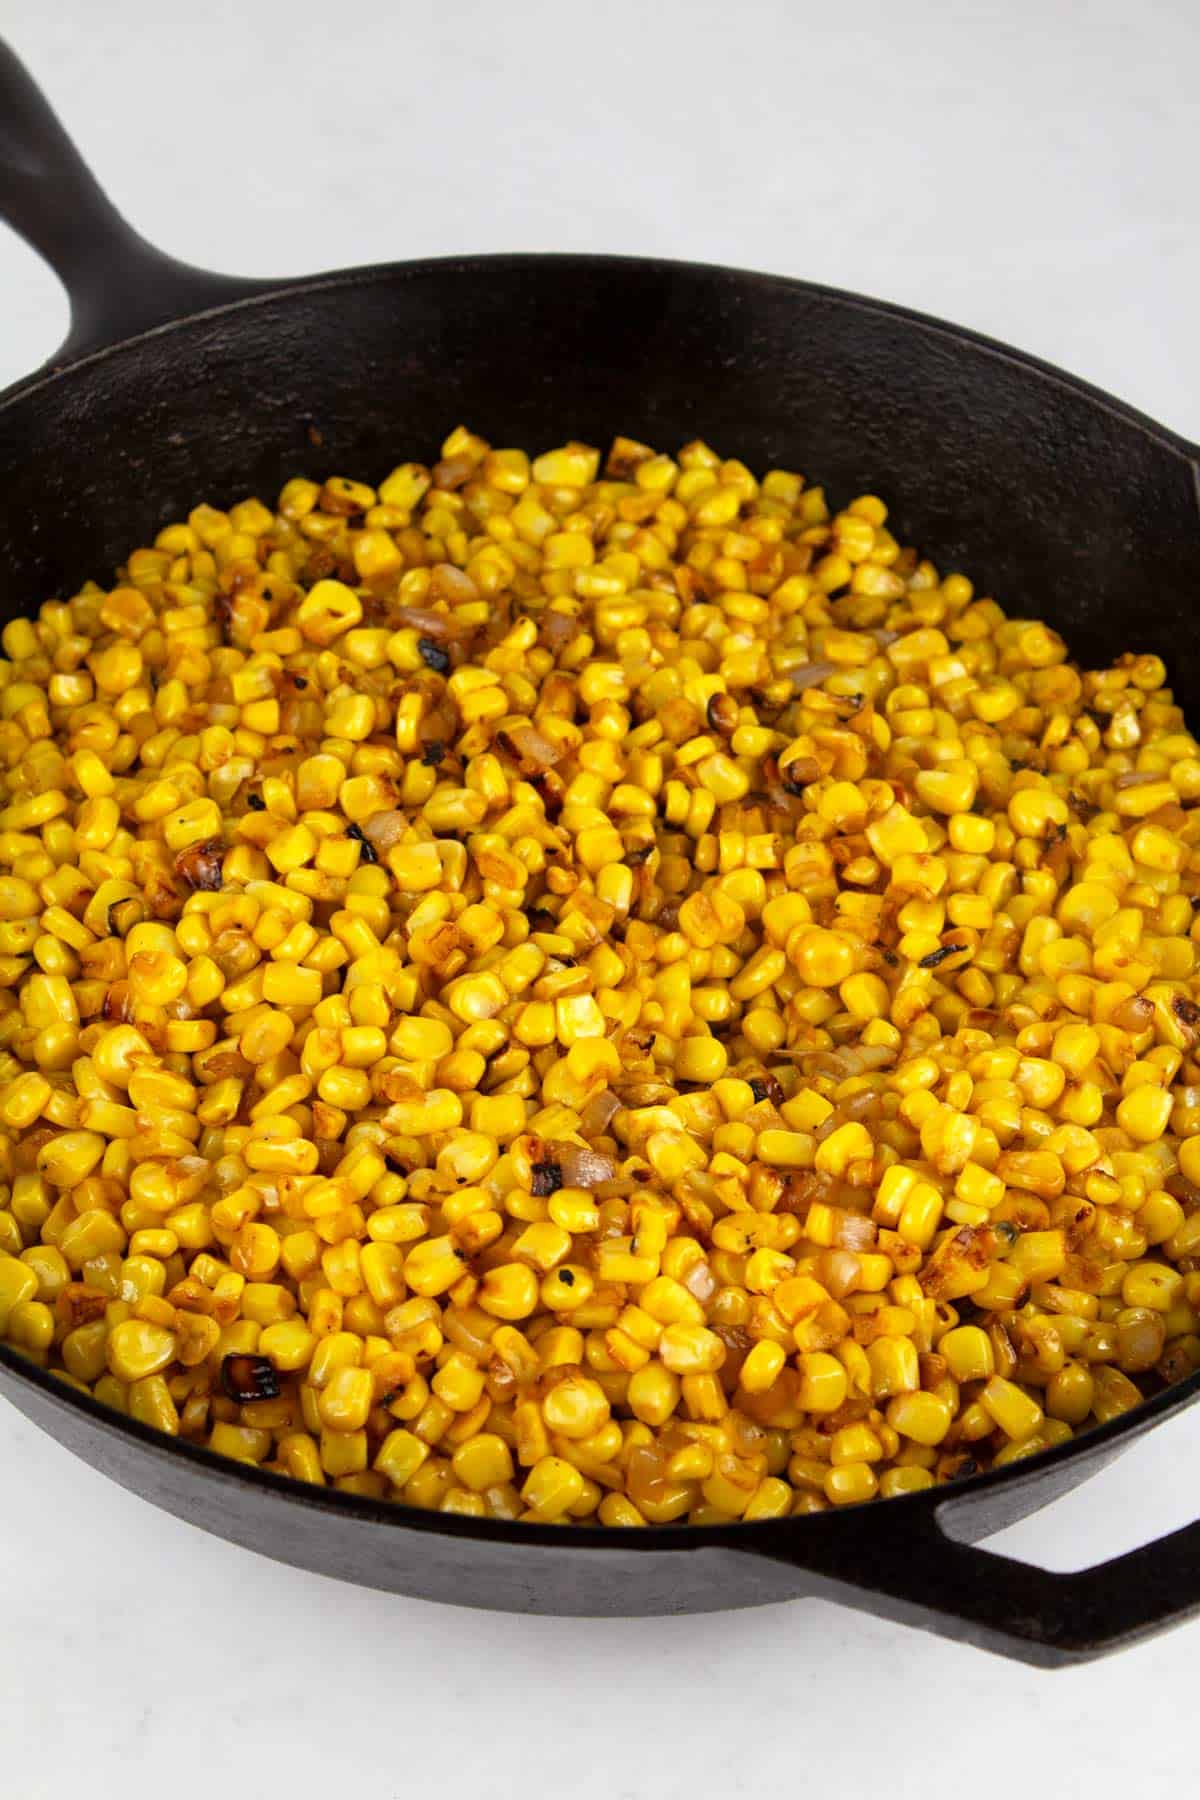
Cook for about 10-15 minutes: You can tell the roasted corn is done when the kernels are soft and speckled with dark golden brown spots throughout. Season with salt and black pepper.
🌿 Variations
- Use fresh herbs during the last 5-10 minutes of cooking time. They accentuate the true flavor of corn. My favorite herbs are thyme, parley, and cilantro.
- Ia great addition in place of just butter is using your favorite herb butter, also known as compound butters. Try a savory flavored butter using softened butter.
- For an easy Mexican corn salad, sprinkle in cilantro and cotija cheese once the corn is fully cool.
👨👩👧👦 For a crowd
Roasted corn is definitely an option for a crowd, but when doubling the recipe it is best to use two separate skillets to avoid overcrowding the pan. Or use one skillet and make the recipe twice. If you choose to use one skillet, hold the first finished batch in a covered heatproof serving dish while making the second batch.
We use whole corn kernels because they are faster to cook on a gas stove and easier to eat than a cob. Plus frozen corn can be made all year long!
🙋 Questions & Answers
Cast iron skillets are most likely going to get you the best results, but you are welcome to use whatever skillet you have on hand. Just make sure that your skillet is large and gets hot enough to ensure the beautiful caramelizing that makes this corn so flavorful.
Removing corn husks and cutting it off the cob is a lot of extra work.... The easiest way to go is frozen corn, so that's our first choice. However, you can also make this recipe with fresh corn kernels or canned corn that has been thoroughly drained.
Yes, no matter the type of corn you can roast it without boiling it first. However, roasting corn kernels (instead of a whole cob) will get you the best results.
My favorite seasonings are just the onion and garlic sautéed in melted butter. They add tons of flavor! For a different flavor profile, you could also try a little bit of chili powder, chili lime seasoning, fresh herbs, feta cheese, parmesan cheese or even chopped red or green bell peppers.
Store roasted corn in an airtight container in the fridge for 3-5 days. Reheat in the microwave or in a skillet on the stove.
👨🏼🍳 Tips & Tricks
- Use a cast iron skillet (affiliate) to produce the most color on the corn.
- After sautéing the onions and garlic, make sure the pan is really hot before adding the corn. This will ensure that the kernels roast and don't steam.
- Do not overcrowd the pan (use a 12-inch skillet). If the pan is too crowded the corn won't be able to caramelize.
- Stir the corn occasionally, but allow plenty of time without stirring to help the dark brown spots to develop.
📖 More favorite recipes
- Mashed Red Potatoes are creamy, fluffy, and buttery every time! The perfect side dish.
- These Baked Beans Using Canned Beans is a shortcut method to get thick, bubbly, "from scratch" beans for every summer bbq!
- These Fresh Green Beans with Bacon are one of those healthy recipes that you actually want to eat. Perfect for the summer months!
- This Pull Apart Bread is slathered with homemade garlic butter and baked until perfectly golden!
- The easiest Honey Beer Bread made with just 6 ingredients!
- Pineapple Glaze For Ham
- Lemon Scones topped with this Lemon Glaze Recipe
- Rich and delicious Chocolate Lava Cake
- Our favorite Rhodes Rolls Monkey Bread
- Super simple Easy Roasted Cauliflower
Recipe
Easy Skillet Roasted Corn (Simple Recipe!)
Ingredients
- 2 pounds frozen corn kernels
- ½ onion diced (yellow, brown, or sweet onion)
- 1½ tablespoon garlic minced
- 2 tablespoon butter
- 2 tablespoon olive oil
- kosher salt to taste
- pepper to taste
Instructions
- Heat a 12-inch skillet over medium-high heat (I prefer cast iron skillets, but any skillet will work).
- Once hot, add in butter and oil until melted. Add in diced onion and garlic. Saute for 2-3 minutes, stirring occasionally, until fragrant and translucent. The pan should stay very hot, but not so hot that they burn.½ onion, 2 tbsp butter, 2 tbsp olive oil, 1½ tbsp garlic
- With the pan very hot, add in frozen corn kernels. Continue to cook for approximately 10 minutes, stirring occasionally. It is done when the kernels are soft and are spotted with deep shades of brown. Finish with salt and pepper to taste.2 pounds frozen corn kernels, kosher salt, pepper
- We love comments! Please come back and leave us one after you've tried this recipe.
Notes
- Use a cast iron skillet to produce the most color on the corn.
- After sautéing the onions and garlic, make sure the pan is really hot before adding the corn. This will ensure that the kernels roast and don't steam.
- Do not overcrowd the pan (use a 12-inch skillet). If the pan is too crowded the corn won't be able to caramelize.
- Stir the corn occasionally, but allow plenty of time without stirring to help the dark brown spots to develop.
Add Your Own Notes
Nutrition
All nutrition information is provided by a third party and is an estimate only. Use your own nutritional calculator for more specific measurements.
Crafty says
I used canned corn and drained the water beforehand. This recipe was delicious!
Misty says
We're so happy you liked it!
Angie says
I didn’t think EVOO could be used for high heat cooking because of the low smoke point.
Misty says
Hi Angie! We have used EVOO successfully many times. You can also opt to use a different oil if you prefer. The key is to have a hot pan, but not out of control hot. Hope this helps!
Anna says
Gooood stuff. I'm starting a list of tasty, savoury, quick breakfasts, and this just made the list.
Sinple, full of flavour.
Misty says
We're so happy you liked it!
Swati Mangat says
Perfect corn!! I used a cast iron skillet and added in chili powder. Thank you for sharing!
Danielle says
So glad to hear you liked it! Chili powder sounds delicious!
Leslie says
I make this every couple weeks and sometimes even weekly in the summer to add to BBQ chicken salads. My family loves it! It is absolute corn-y perfection! Thank you for the wonderful recipe!
Danielle says
Wow! What high praise! We are so happy you enjoy it. I am going to try adding it to salad next week! Great idea!
Ruth says
Thank you for this delicious, easy skillet corn. When Panera eliminated fire-roasted corn from their Southwest Avocado Chicken Salad, it lost a lot. But thanks to you, I learned how to make my own using Trader Joe’s frozen yellow corn. My garlic did burn a bit after the corn was added, Should more EVOO be added? Thanks for your help, and thorough instructions!
Ruth
Misty says
So glad you liked it! My best tip for avoiding burned garlic is to watch the heat. It should be a really hot pan, but not so hot that the garlic quickly burns. Try turning it down just a bit a next time and see if that helps.
Gar says
Always add fresh garlic at the end of any fry/sauté recipes, or even if you are baking a caramelized veggie tray ; garlic will burn in 60 seconds....took me a while (years!) to learn this! 🙂
Troy says
Adding garlic later is such good advice. Wish I'd read your comment as a reminder before making this recipe. I don't care for roasted garlic anyhow. It always tastes bitter to me. This garlic definitely tasted burnt. Next time will be adding the garlic towards the very end.
Thanks
Misty says
I'm glad this suggestion was helpful for you, Troy! The garlic definitely shouldn't burn. If it is burned, the heat was probably a little too high. I would suggest turning it down a bit next time. Every stove top is different, so you might have to play with it to find the balance between getting it hot enough to sear, but not so hot that it burns. Hope this helps!
sharon lancaster says
YES!!! Garlic will burn, so I add it toward the end. You still get great flavor!