

It isn't difficult to master the perfect Graham Cracker Crust for Cheesecake! All you need is 3 ingredients and 15 minutes of hands on time to make a buttery, crispy base that you can use with any of our Cheesecake Recipes, or a favorite of your own. Plus we include our favorite method for getting the perfect side-to-bottom ratio, tips to avoid a crumbly texture, and the best way to avoid a soggy texture while baking.
Check out the full post for step by step photos and instructions for success. It is absolutely worth it for that delicious homemade flavor!

A really good crust can genuinely be the factor that makes your dessert stand apart from the rest! We have made this one dozens of times and are here to help you steer you clear of bland, crumbly results.
This is the recipe we use for all of our favorites, like this Lemon Cheesecake Recipe or this Raspberry Cheesecake Recipe. You can use it for any of your favorites, for any occasion!
Skip to:
- Why this recipe is great
- Ingredients for graham cracker cheesecake crust
- Truly helpful tools
- How to prepare a springform pan for cheesecake
- How to make graham cracker crust for cheesecake
- Can I make substitutions?
- How to use this crust
- Why isn't my crust staying together?
- Make ahead and freezer tips
- FAQs
- Tips & Tricks
- More graham cracker crust desserts
- Recipe
- Comments
Why this recipe is great
- Just 3 simple ingredients!
- We show you a simple method to get the perfect thickness on the sides and bottom without the usual hassle.
- It's the perfect balance of sweet, buttery, and crispy (it won't fall apart when you cut it).
Ingredients for graham cracker cheesecake crust
This recipe only requires 3 ingredients that you may already have in your pantry! Here are a few tips to really help yours shine.

- Graham crackers: My top tip is to use whole sheets and buy them fresh so they aren't stale. Any brand will work, however they do taste different. Our favorite is actually the Kroger generic instead of name brand.
- Granulated sugar: Besides adding a hint of sweet, this actually helps bind the crumbs together while baking so that it doesn't crack or crumble when you eat it later. Don't skip this or substitute with brown sugar for best results.
- Salted butter: If you use unsalted, add a pinch of salt to the crumbs to enhance the flavor. It is super important to use real butter for both taste and final texture.
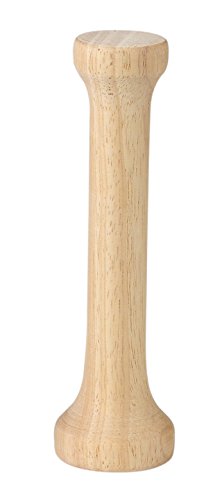
Truly helpful tools


![Katbite 200PCS 12x16 In Heavy Duty Flat Parchment Paper, Parchment Paper Sheets for Baking Cookies, Cooking, Frying, Air Fryer, Grilling Rack, Oven(12x16 Inch)[Advanced Series]](https://m.media-amazon.com/images/I/41BATbh8sxL._SL500_.jpg)
How to prepare a springform pan for cheesecake
This is by far the easiest way to prep your pan so that your crust doesn't stick and nothing leaks! It's so much easier than cutting parchment for the bottom and sides.

First, open the clasp on a 9 inch springform pan and remove the top piece. Lay a piece of parchment paper on the bottom circle.
Replace the top piece, pressing down over the bottom of the pan, and fold the clasp back in place. You should now have a tightly closed pan with the parchment securely in place.

Next, simply use a pair of scissors to trim the parchment, leaving about an inch of overhang.
Spray the bottom and sides lightly with non-stick baking spray (regardless of the brand, look for a spray that contains flour as one of the ingredients to discourage your baked goods from sticking).
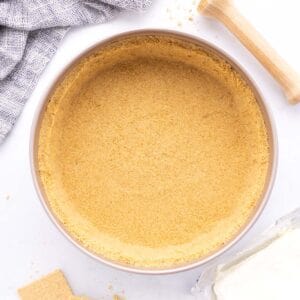
How to make graham cracker crust for cheesecake
Once your pan is prepared, preheat the oven to 350°F.

Place 16 graham cracker sheets in a food processor, breaking them in half if it helps them fit more easily. Pulse until they are fine crumbs and no large pieces remain.
16 sheets should yield right about 2 cups of crumbs.

Pour in the white sugar and melted butter (it should still be warm).

Pulse the mixture until it is combined and the mixture has the texture of damp sand. If needed, use a rubber spatula to scrape the bottom and sides so that everything is evenly mixed.

Pour about half the crumbs into the prepared pan and push them to the sides. Use a tamper or flat measuring cup to press the crumbs firmly into the sides, taking it about 1.5-2 inches up the side.
To create a sturdy top edge, use your left thumb to press down on the edge with a gentle but firm pressure while simultaneously using the tamper in your right hand to press into the side. Keep doing this all the way around the edge.

Pour the remaining half of the crumbs into the bottom of the pan. Use the tamper or measuring cup to press it firmly into the bottom. I like to go back around the whole thing twice because it gets a little firmer the second time.
Bake it for 10 minutes, until it is lightly golden brown and fragrant. Remove from the oven and set aside to cool.
Can I make substitutions?
There are two commonly asked substitution questions that I would like to answer here.
- Can I substitute with pre-ground crumbs? My genuine answer is that I don't suggest it. In my experience, crumbs from the store are usually stale, which noticeably impacts the final result.
- Can I substitute with other cookies or crackers (i.e. digestive biscuits, Oreos, Biscoff cookies, etc)? Other cookies have different amounts of added sugar, texture, and even moisture, which impacts how much butter and sugar you need to make a succesful crust. I suggest looking up a specific recipe for the product you want to use for best results.
How to use this crust
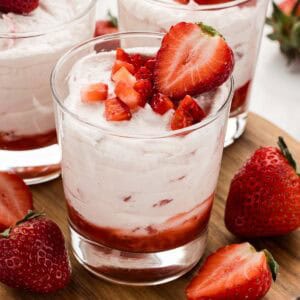
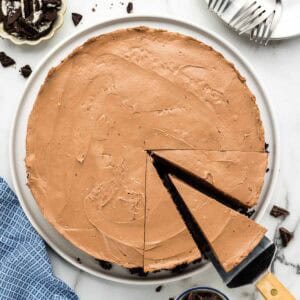
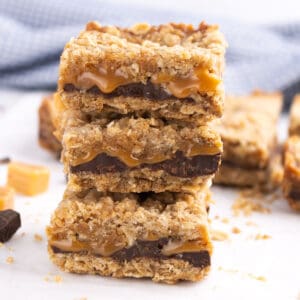
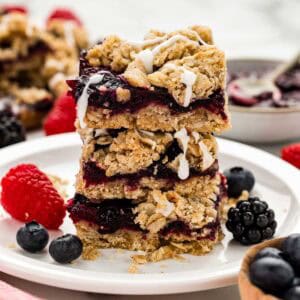
You can bake any of your favorite recipes in this base, plus it goes with any number of popular toppings. Here are a few suggestions to inspire something delicious!
- Strawberry Cheesecake
- Blackberry Swirl Cheesecake
- Raspberry Sauce for Cheesecake
- Fresh Strawberry Topping for Cheesecake (crazy delicious!)
- How to Swirl a Cheesecake (use your favorite topping and batter to make something beautiful!)
Why isn't my crust staying together?
If it is crumbly, here are a few questions to troubleshoot it.
- Did you make any substitutions? Each ingredient and quantity is specific and important in this recipe. Substitutions will not yield the same result.
- Did you pack it firmly? Loosely packed crumbs will fall apart every time.
- Did you press into the pan right after making the crumb mixture? If you let the mixture sit before pressing it into the pan, the butter will cool and change the texture, making it harder to form correctly.
- Did you bake it? No-bake crusts have their place for some desserts, but they are without a doubt more crumbly. Baking it allows the butter and sugars to melt, interact, and solidify to hold everything together.
Make ahead and freezer tips
I truly get best results when making this fresh because it seals better with the filling that way. But if you need it ahead, here are a few tips.
Make ahead instructions: You can bake this ahead, allow it to cool fully (really, or it will get soggy). Then wrap tightly in plastic wrap and store it at room temperature for 1-2 days.
Freezer instructions: After baking it, allow it to cool fully and then freeze it uncovered for a few hours. Once it is solid, wrap the whole pan tightly in plastic and foil and freeze for 2-3 months. Allow it to come completely to room temperature before using.
FAQs
Yes, this recipe is specifically designed to be baked to encourage it to hold together. Plus it has more of that golden, toasty flavor that makes it so worth it!
Allow it to cool slightly before adding your filling (I usually wait 10-15 minutes). When you add the filling to a slightly warm crust, it helps it seal together. If it is completely cool, it may separate from the filling when you cut it later.
Yours will never stick if you follow these steps! First, line the bottom of the pan with parchment. Second, spray the pan lightly with a baking spray that contains flour. Lastly, allow the cheesecake to cool fully before you open the clasp on the pan. As it cools, it naturally pulls away from the edges and makes it easier to remove.
This recipe is too much for a pie plate. It is designed to fit into a 9-inch springform pan and come up the side a full 1.5-2 inches, creating a thick and sturdy crust to hold the weight of cream cheese.

Tips & Tricks
- Don't be afraid to go back and press it in again after you have the initial shape. It gets sturdier and more even after a couple go arounds.
- The goal is to press it firmly so that it holds a tight shape, but not so drastically firm that is turns into a hard rock.
- Avoid a soggy texture by adding your batter to the baked crust only right before you bake the cheesecake, and skip the water bath.
- Although you can use a measuring cup, a tamper really is a worthwhile (and affordable) tool that makes the final results better.
More graham cracker crust desserts
Looking for other recipes like this? Try these:
Recipe
Graham Cracker Crust for Cheesecake (Favorite Method!)
Ingredients
- 16 sheets graham cracker (about 2 cups of crumbs)
- ¼ cup granulated sugar
- 8 tablespoon butter melted
Instructions
- Preheat oven to 350℉. Line a 9 inch springform pan with parchment paper, then spray lightly with baking spray (make sure it contains flour as an ingredient). Check out the post above for detailed photos and instructions of our favorite, foolproof way to do this.
- Place the graham cracker sheets in a food processor. Pulse until they are fine crumbs and no large pieces remain.16 sheets graham cracker
- Add the sugar and melted butter (it should still be warm). Pulse the mixture until it is combined and the mixture has the texture of damp sand. Use a rubber spatula to scrape the bottom and sides so that everything is evenly mixed.¼ cup granulated sugar, 8 tbsp butter
- Pour about half the crumbs into the prepared pan and push them to the sides. Use a tamper or flat measuring cup to press the crumbs firmly into the sides, taking it about 1.5-2 inches up the side. To create a sturdy top edge, use your left thumb to press down on the edge with a gentle but firm pressure while simultaneously using the tamper in your right hand to press into the side. Keep doing this all the way around the edge.
- Pour the remaining half of the crumbs into the bottom of the pan. Use the tamper or measuring cup to press it firmly into the bottom. I like to go back around the whole thing twice because it gets a little firmer the second time.
- Bake it for 10 minutes, until it is lightly golden brown and fragrant. Remove from the oven and set aside to cool slightly before adding your choice of cheesecake filling.
Notes
- Don't be afraid to go back and press it in again after you have the initial shape. It gets sturdier and more even after a couple go arounds.
- The goal is to press it firmly so that it holds a tight shape, but not so drastically firm that is turns into a hard rock.
- Avoid a soggy texture by adding your batter to the baked crust only right before you bake the cheesecake, and skip the water bath.
- Although you can use a measuring cup, a tamper really is a worthwhile (and affordable) tool that makes the final results better.
Add Your Own Notes
Nutrition
All nutrition information is provided by a third party and is an estimate only. Use your own nutritional calculator for more specific measurements.
Lisa Walker says
I couldn’t find the oven temperature
Danielle says
Oh my goodness! I am so sorry that we missed that detail! The oven temperature is 350 degrees. I fixed the recipe card, but if there is anything else please let us know.
Misty says
This method makes the perfect texture for cheesecake crust!