

It's easy to master a homemade Oreo Crust for Cheesecake! All you need is 2 ingredients and 15 minutes of hands on time to make a stand-out base that you can use with any of our Cheesecake Recipes or a favorite of your own. We include our go-to method for getting the perfect thickness on the sides and bottom, plus tips to avoid a crumbly or soggy texture.
Check out the full post for step by step photos and instructions for success. It's honestly so good that it might just be your favorite part of the dessert!

Nothing makes a dessert stand out better than a really good crust! We have made this one dozens of times and are here to help you master it too.
This is the recipe we use for our most popular White Chocolate Raspberry Cheesecake and our delicious Vanilla Oreo Cheesecake Recipe. No Oreos on hand? Try this Graham Cracker Crust for Cheesecake instead!
Skip to:
- Why this recipe is great
- Ingredients for Oreo cheesecake crust
- Equipment to make this recipe
- How to line a springform pan with parchment
- How to make Oreo crust for cheesecake
- Make ahead and freezer tips
- How to use this Oreo crust recipe
- Why is my crust crumbly?
- FAQs
- Tips & tricks
- More recipes with Oreos
- Recipe
- Comments
Why this recipe is great
- Just 2 simple ingredients!
- It's noticeably more flavorful than a store bought crust!
- We include a simple method to get the perfect thickness on the sides and bottom without the usual guessing.
- It's buttery and crispy, with the perfect firm texture to hold up a dense cream cheese filling. It won't crumble or fall apart when you slice it!
Ingredients for Oreo cheesecake crust
This recipe only requires 2 ingredients that you may already have in your pantry! Here are a few tips to truly get the best results.

- Oreo cookies: My top suggestion is to use freshly purchased Oreos, because you can really taste the difference (that container that's been hiding in the pantry for 6 months is stale, I promise). A standard package is enough for this recipe. I use regular, not double stuff.
- Salted butter: It's very important to use real butter (not margarine or a tub of a butter substitute). It impacts the taste and texture significantly.
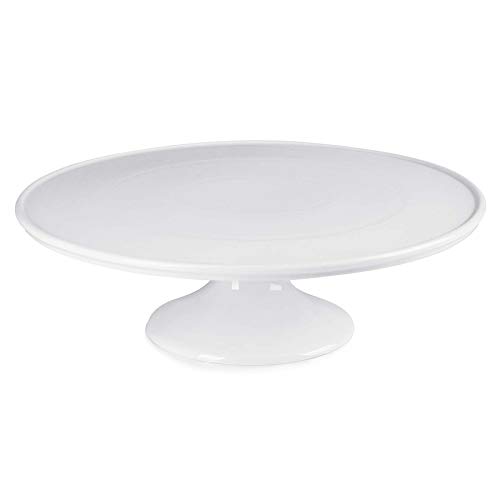
Equipment to make this recipe


How to line a springform pan with parchment
This is the simplest way to prepare a springform pan so that your crust doesn't stick and nothing leaks! Plus it takes less than 2 minutes, start to finish.

First, remove the top piece of a 9 inch springform pan. Lay a piece of parchment paper on the bottom tray, then put the top piece back in place, clasping it completely shut.
You should now have a tightly closed pan with the parchment flat and secure on the bottom.

Use scissors to trim the parchment on the outer edge, leaving about an inch of overhang.
Last, use non-stick baking spray to lightly grease the bottom and sides of the pan. Make sure to use a spray that contains flour as one of the ingredients to prevent sticking.
How to make Oreo crust for cheesecake
Once your pan is prepared, preheat the oven to 350°F.

In a food processor, pulse 30 whole Oreo cookies until they are fine crumbs and no large pieces remain. If needed, use a rubber spatula to scrape the sides and bottom.

Pour in the warm melted butter and pulse until everything is well combined.

The mixture should have the texture of damp sand. I find it helpful to use a rubber spatula to scrape the bottom and sides to make sure it is mixed evenly.

Pour half the crumb mixture into the pan and push it evenly to the sides. Use a tamper or flat measuring cup to press the crumbs firmly 1.5-2 inches up the sides.
For the top edge, I like to use my left thumb to press down gently but firmly, while simultaneously using the tamper in your right hand to press into the side. This allows everything to compact.

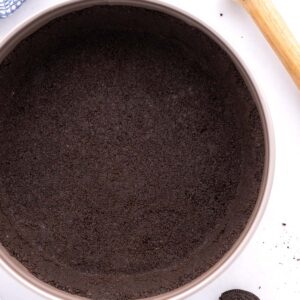
Once the sides are done, pour the remaining half of the crumb mixture into the bottom of the pan. Press it firmly and evenly across the bottom, going around a couple times if needed to really make sure it is compact.
Bake it for 8-10 minutes, or until it is lightly fragrant. Remove from the oven and set aside to cool.
Make ahead and freezer tips
I suggest making this fresh because it seals better with the filling that way. But here are tips if you need it done ahead of time.
Make ahead instructions: Bake it as instructed, cool it completely, then wrap the whole pan tightly in plastic wrap. Store it at room temperature for 1-2 days.
Freezer instructions: Bake as instructed, cool fully, then put it in the freezer uncovered for a few hours. Once it is solid, wrap the whole pan tightly in a layer of plastic and foil. Freeze for 2-3 months. Before using, allow it to come to room temperature.
How to use this Oreo crust recipe
You can bake any cheesecake filling in this base, plus it goes with plenty of popular toppings. Here are a few suggestions to get started!
- Chocolate Cheesecake
- Raspberry Cheesecake
- Pumpkin Cheesecake
- How to Swirl a Cheesecake (use your favorite topping and batter to make something beautiful!)
- Raspberry Sauce for Cheesecake
- Chocolate Ganache for Cheesecake
Why is my crust crumbly?
This crust should be firm and sturdy, not crumbly. If it is crumbly, here are a few troubleshooting suggestions.
- Did you pack the crumbs firmly? If it was loosely packed, it will fall apart.
- Did the crumb mixture sit before you pressed it into the pan? If the butter cools too much, it makes it more difficult to compact firmly. Make sure to press the crumbs into the pan right after making the mixture.
- Did you use real butter? If you substituted with something else, you will not get the same results.
- Did you bake it? No-bake crusts are always more crumbly. Baking it allows the ingredients to solidify to hold everything together.

FAQs
No, you do not need to remove the filling. It actually adds moisture to the crust and helps it stay together. Plus it adds more of that classic flavor!
Yes, this recipe is specifically designed to be baked to ensure it is flavorful and not crumbly.
You should allow the crust to cool slightly before adding your filling, about 10-15 minutes. When you add the filling to a slightly warm crust, it helps it seal together. If it is completely cool, it may separate from the filling when you cut it later.
This recipe is too much for a pie dish. It is designed to fit into a 9-inch springform pan and come up the side a full 1.5-2 inches, creating a thick and sturdy crust to hold the weight of cream cheese.
Tips & tricks
- When pressing the crust into the pan, go back and press it again a couple times. Each time around helps it compact a bit better and hold it's shape.
- You want to use a firm pressure so that it doesn't crumble, but not so firm that it turns into a hard rock.
- Avoid a soggy crust by adding batter to the baked crust right before you bake the cheesecake, and skip the water bath.
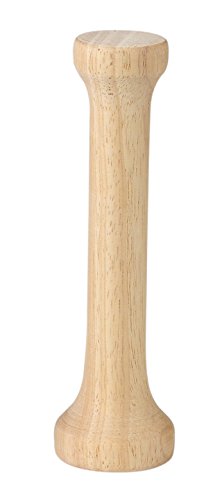
- A tamper really is a worth the small investment! It fits easily in the pan and does the job well.
More recipes with Oreos
Looking for other recipes like this? Try these:
Recipe
Oreo Crust for Cheesecake (Favorite Method!)
Ingredients
- 30 Oreo cookies
- 6 tablespoon butter melted
Instructions
- Preheat the oven to 350 F. Line a 9 inch springform pan with parchment paper, then spray lightly with baking spray (make sure it contains flour as an ingredient). Check out the post above for detailed photos and instructions of our favorite, foolproof way to do this.
- Place the Oreos in a food processor. Pulse until they are fine crumbs and no large pieces remain.
- Add the melted butter (it should still be warm). Pulse the mixture until it is combined and the mixture has the texture of damp sand. Use a rubber spatula to scrape the bottom and sides so that everything is evenly mixed.
- Pour about half the crumbs into the prepared pan and push them to the sides. Use a tamper or flat measuring cup to press the crumbs firmly into the sides, taking it about 1.5-2 inches up the side. To create a sturdy top edge, use your left thumb to press down on the edge with a gentle but firm pressure while simultaneously using the tamper in your right hand to press into the side. Keep doing this all the way around the edge.
- Pour the remaining half of the crumbs into the bottom of the pan. Use the tamper or measuring cup to press it firmly into the bottom. I like to go back around the whole thing twice because it gets a little firmer the second time.
- Bake it for 8-10 minutes, until it is lightly fragrant. Remove from the oven and set aside to cool slightly before adding your choice of cheesecake filling.
Notes
- When pressing the crust into the pan, go back and press it again a couple times. Each time around helps it compact a bit better and hold it's shape.
- You want to use a firm pressure so that it doesn't crumble, but not so firm that it turns into a hard rock.
- Avoid a soggy crust by adding batter to the baked crust right before you bake the cheesecake, and skip the water bath.
- A tamper really is a worth the small investment! It fits easily in the pan and does the job well.
Add Your Own Notes
Nutrition
All nutrition information is provided by a third party and is an estimate only. Use your own nutritional calculator for more specific measurements.


Dawn says
this is an amazing crust and so easy. I made two cheesecakes I did not double the recipe, but prepared separately. one crust was cake like, while the other crust was crunchy and delicious. what made the difference
Misty says
Hi Dawn! I am glad you like this crust! I have never had one turn out with a cakey texture. My first thought would be that perhaps it accidentally had too much butter. My second thought is that the cheesecake filling on the cakey one had too much moisture, and made the crust soggy. There are a lot of factors that could potentially cause a change, although a cake texture with Oreos is not common. If you have more details that I can help think through, I would be happy too! Thanks for taking the time to come leave your feedback.
Misty says
Super simple and nice and crispy!